Each year at the start of May there is an International Dawn Chorus day. And off the back of this comes Reveil, an annual broadcast that comes from an art collective called SoundCamp.
Around the world, people participate by placing open microphones wherever they happen to be, capturing all the glory of their local dawn chorus. These live streams can all be found on the Locus Sonus Soundmap.
From there these streams they produce a continuous stream of dawn choruses from across the globe:
Starting on the morning of Saturday 4 May just before daybreak in Rotherhithe near the Greenwich Meridian, the Reveil broadcast will pick up these feeds one by one, tracking the sunrise west from microphone to microphone, following the wave of intensified sound that loops the earth every 24 hours at first light.
Reveil website
The resulting stream is broadcast on a number of radio stations throughout the world including Resonance Extra in London.
Even if you do nothing else, the Soundmap is well worth exploring – especially over that weekend. But many of the microphones are live 24/7 all year round.
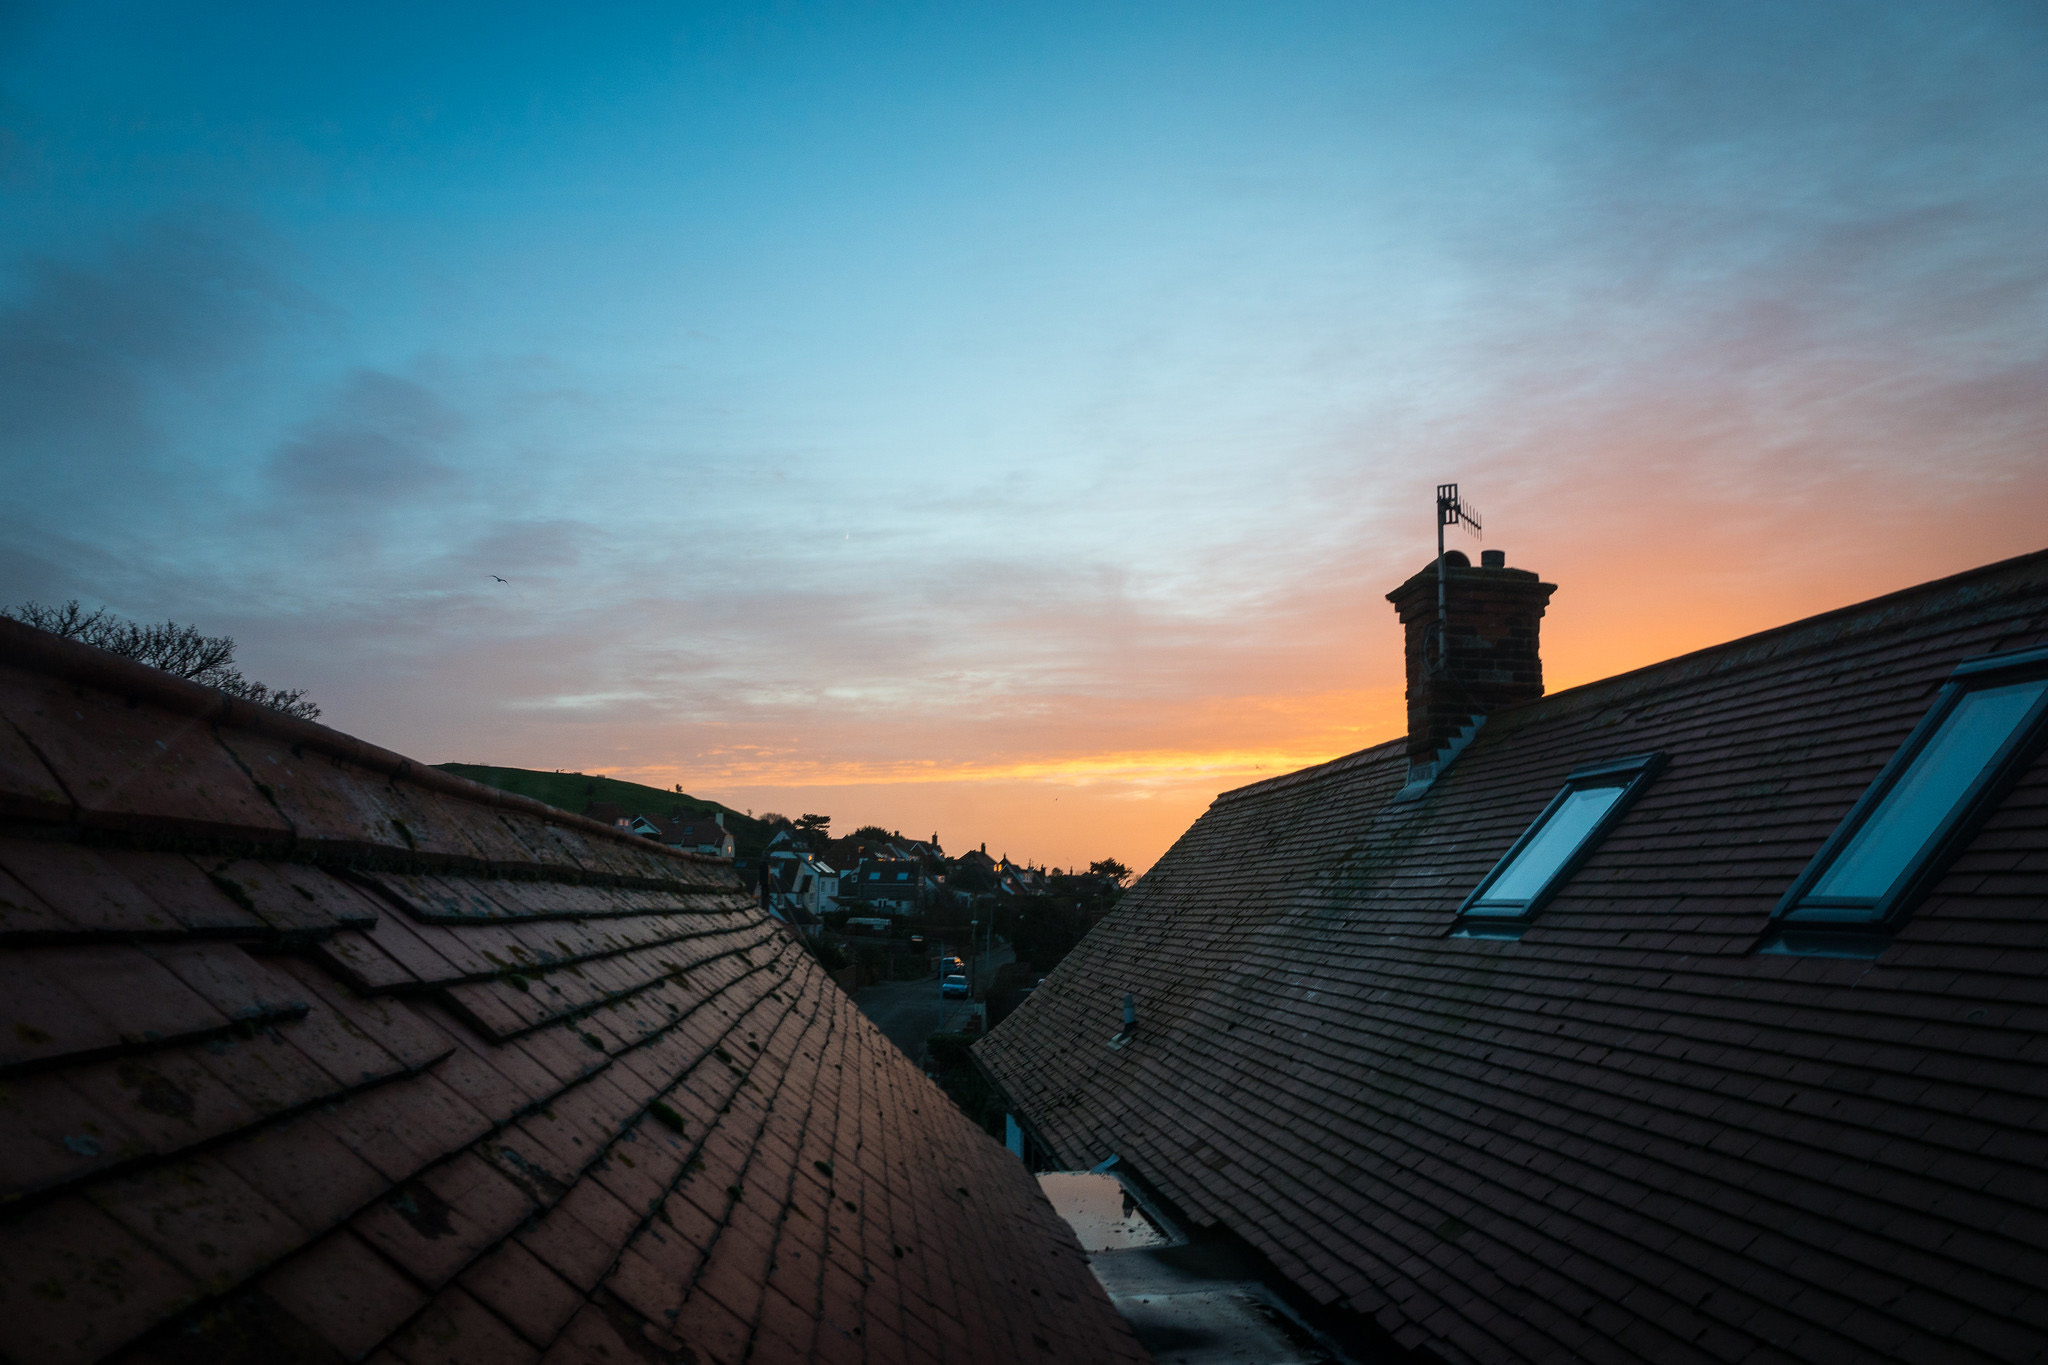
In 2018, I contributed to this for the first time. I’ve no idea if any of my audio was used – I don’t live on a nature reserve, and so my microphone captures an urban environment. But there are plenty of birds around and the dawn chorus is quite loud (see below for an example).
The really great thing is that it’s surprisingly easy to create a live stream. While you could use your laptop, or even a mobile phone, my preferred method was to build a Raspberry Pi based streamer.

The Reveil site has links to a document that instructs you in how to create your open streams, but I thought I would detail exactly what I had to do to get everything to work.
Here’s what you’ll need:
- A Raspberry Pi – I’m using a Raspberry Pi 3 Model B+ (£33), but other older or cheaper models will work. I’m unsure whether a Pi Zero is “beefy” enough for the job however.
- A microSD card – I use a 16GB card (£6)
- A micro-USB power adaptor – You could use some kind of powerbank for portability, but I’m using the official charger to provide a constant 5V (£8)
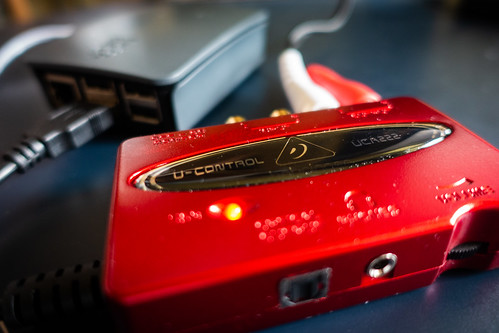
- A USB soundcard – There are many very cheap options available, but I wanted one that captured stereo, and cheap ones tend to be mono. So I went for the still reasonable Behringer UCA222 (£25). The cheaper UCA202 would have done as well, but it wasn’t in stock when I bought mine.
- A microphone – The range of options here is vast, as are the prices you can pay. I have a pair of Naiant omni-directional microphones with XLR connectors. Since the soundcard doesn’t have XLR inputs, an adaptor would be needed. But I also wanted to record my audio, so I placed a Zoom H5 audio recorder in between the microphones and the soundcard negating the need to also use an adaptor. Depending on what microphone you’re using, you may also need a simple adaptor or cable.
- An ethernet cable to connect the Pi to your WiFi router. Once set-up, you can connect your Pi solely by WiFi if you prefer.

The first thing you need to do is download a specific operating system for the Raspberry Pi that is already set-up to simplify things.
There are two versions of the image files here: one for much older first generation Raspberry Pis, and the one I needed for generation 2 and 3.
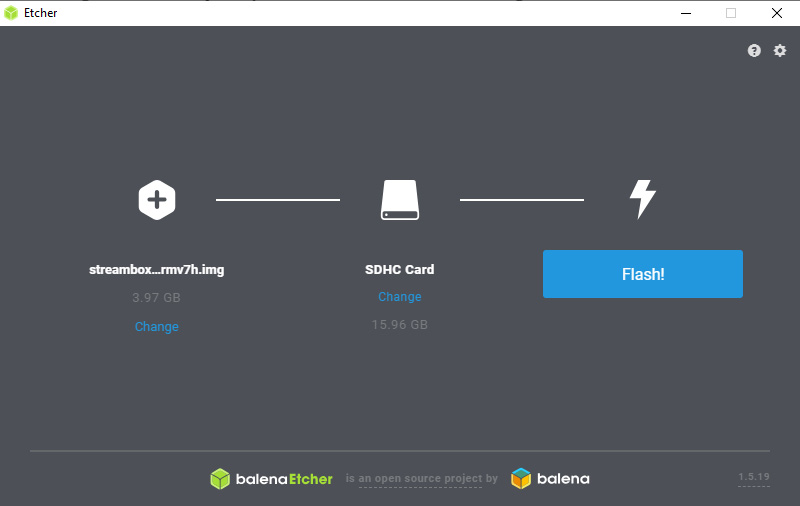
Then use a program such as Etcher to write the downloaded image to a microSD card. There are PC, Mac and Linux versions. You simply open Etcher, attach the microSD card to your computer via a card reader or card slot. Etcher should spot the card (make sure it has identified the right one!), point it towards the image file you downloaded (it will be called something like “streambox-wsp-3.1-armv7h.img.gz”) and ‘Flash’ your card. Note that in Windows you may see some error messages pop up about your card. That’s because the format of the card is optimised for Linux rather than Windows.
By connecting your Pi initially using ethernet to your router or modem, you can then set the whole thing up without using a separate keyboard or monitor into your Pi. You simply use a computer already on your network.
It’s fairly straightforward to set-up using the How to Configure instructions here.
Create a Locus Sonus account, and note the settings from your account. You do have to wait for the account to be verified which may take some time, but you can test your stream in the meantime. They will provide you with a bespoke URL of the form:
http://locus.creacast.com:9001/region_town.ogg.
Locus Sonus has naming conventions for streams which you must adhere to. There are also boxes to explain what your particular audio set-up is and a bit more about your location. You can upload a photo too.
These are the details you see when you explore the Soundmap.
Having registered your account, and provided longitude and latitude figures of your location, the next step is set-up your Raspberry Pi.
To connect to your Pi, power it up, open a web browser on a computer that’s on the same network as your Raspberry Pi. You then simply visit http://streambox.local where you can begin to open all your details.
You should see this screen if all is well:
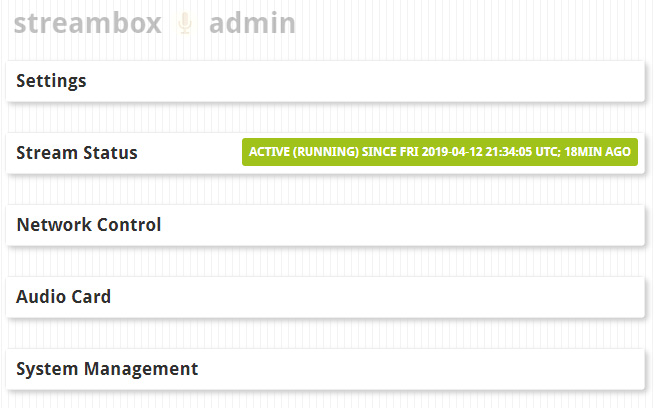
There are a few major sections, which you can complete in turn. When you’ve done so, be sure to click Save which is highlighted in blue when you make a change.
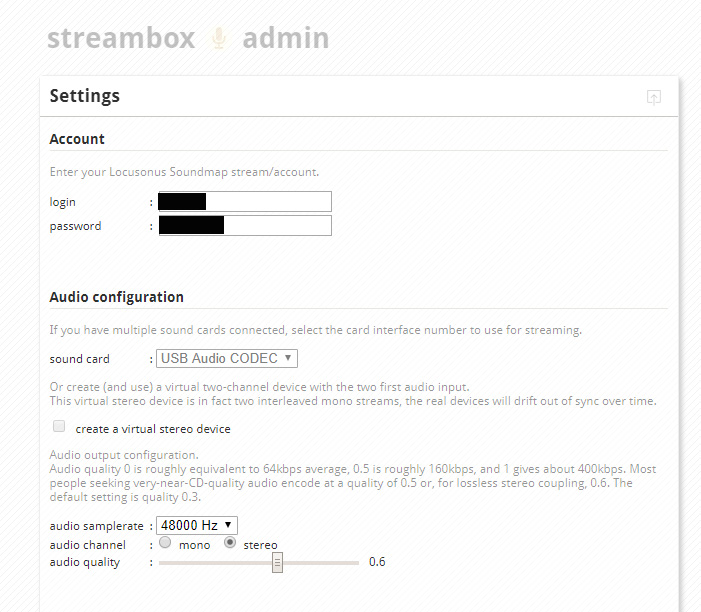
In the Account section enter the details as you registered them above.
Until you plug in a soundcard to your Pi, you may not see anything in the sound card dropdown. But once you have, it should show up here. As you can see, the Behringer I’m using is just called ‘USB Audio CODEC.’
You can ignore ‘create a virtual stereo device’ unless you are trying to combine two mono soundcards.
I chose a samplerate of 48000 Hz, and since I am using two microphones as a stereo pair, I have stereo selected in audio channel.
I used 0.6 as my audio quality (lossless), since I have decent bandwidth.
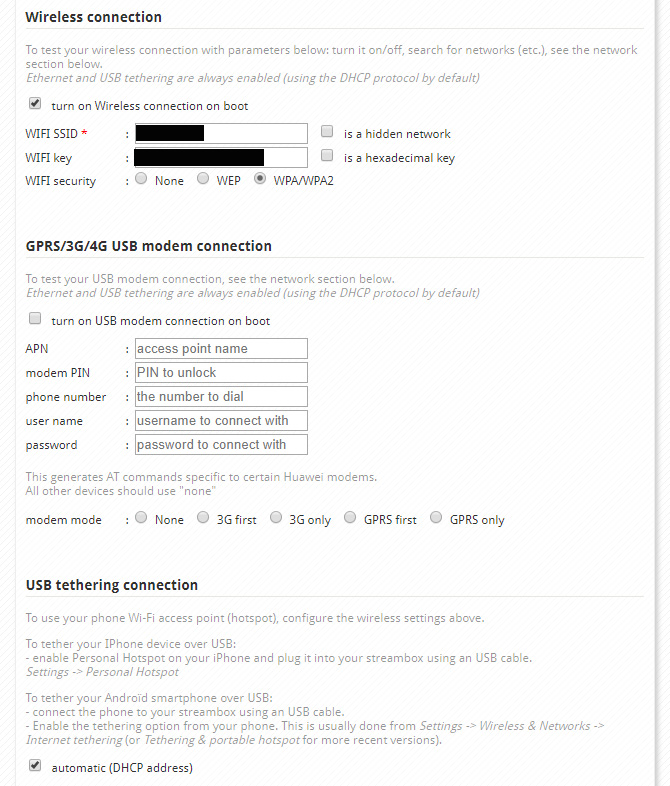
The next section deals with your WiFi network. Enter your SSID and WiFi password here, making sure you tick turn on Wireless connection on boot. You can ignore this if you’ll only be using an ethernet connection.
Since I’m not using a 3G/4G dongle, I left the next section empty. Nor am I doing USB tethering to a phone.
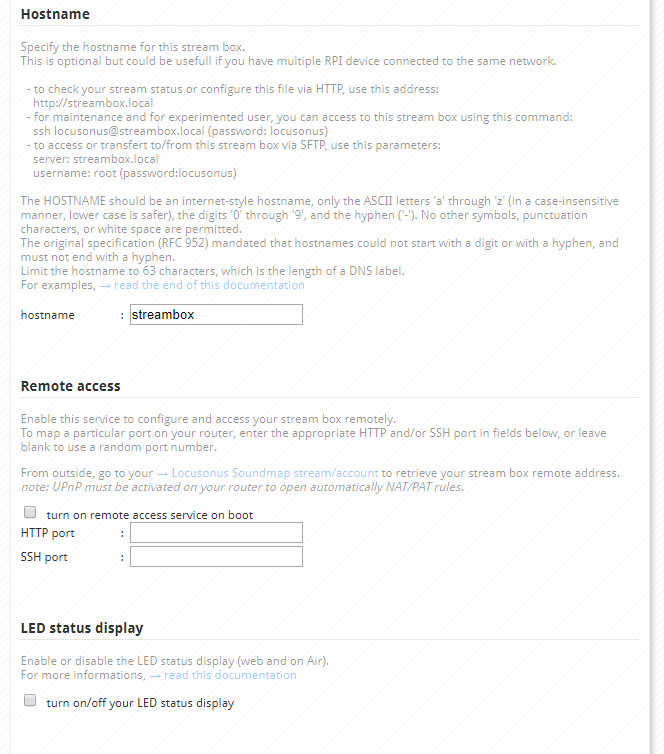
You can change the name of your device here. I’ve left mine as the default hostname – streambox. Note that if you change this, you will need to amend the URL you connect to in future. E.g. http://mynewlynamedstreambox.local.
Renaming is certainly useful to do if there is more than one streaming box on the same network.
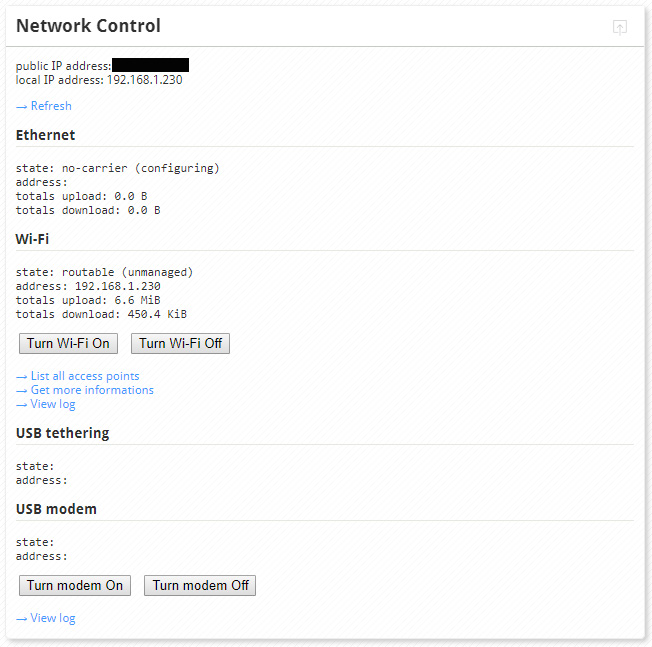
Finally, the Network Control section reveals your public IP address – the one determined by your internet provider, and then the local IP address on your network. You can also use this to connect to your streambox directly. E.g. http://192.168.1.230 in my case. Your local IP address will be different but will likely be of the form 192.168.1.xxx. All of this is for information purposes only. The soundmap uses its own streaming URL to provide listeners access to your microphones.
If you haven’t already, plug your microphone(s) either directly into your soundcard, or via an audio recorder as I do.
Plug your soundcard into one of the Raspberry Pi’s free USB sockets. Note that you shouldn’t need to install any specific drivers on the Pi. The device will just recognise the soundcard. It should show up under sound card as above.

My microphones are small omni-directional ones, not dissimilar in size to the kind of lapel microphones video and TV makers use. So I use an old trick to mount the pair of microphones to a wire coat-hanger. This gives me a bit of separation between the microphones.
I am able to place this out of my flat’s window, closing it to try to keep things like my TV from being captured on microphone. Of course if you have long enough wires, you could place the microphones somewhere protected from the elements at the end of a garden or similar.
Indeed there are ways to fully weather-proof your entire set-up, use battery power to run the microphones, and use a 3G or 4G dongle to stream via mobile.
Notice that in the photo, I don’t have much in the way of a windshield on it. Obviously depending on local weather conditions will dictate whether you need to protect your microphone from local conditions.
With the soundcard plugged into my Pi, and the Streambox software recognising the capture card with no problem, the feed of my audio hosted at locus.creacast.com was working. Even before I had been verified, I was able to test it out.
Obviously there will be a delay in the encoding, uploading and downloading. So you end up with weird 20 second loops happening if you play back the sound you’re recording via PC speakers placed near the microphones.
“Tape” loops are always fun!
Beyond testing, you won’t want to be monitoring the output of your microphones with speakers once you’re up and running. Instead, you can plug in some headphones – either into your audio recorder if you’re using one, or into the headphone jack of your soundcard. The Behringer I’m using even has a volume control to monitor the levels, although that control does not effect your microphones’ levels. You will need a recorder (or mixer) to adjust those if your microphone sounds too quiet.

Once you’re verified and have provided all the information, restart your Streambox and you should be on the map!
As mentioned above, there are live microphones to listen to all year round – although more pop-up (like mine!) during the Reveil period.
Last year, the curated broadcast was carried in a few places – not least a selection of radio stations around the world like Resonance Extra.
Embedded below is a some of what I recorded in 2018. As I say, I live in an urban environment, so there are cars at all hours along some of the nearby roads. And it’s worth noting that since some birds get up much earlier than others, and the real noise doesn’t start until about 1:30 into this.
While it would be fun to leave some microphones up permanently, the truth is that I don’t really have anywhere suitable to do.
You would mostly hear the sounds of urban living – TV, radio, music. There always seems to be construction work locally as well. But the sound of foxes mating is certainly distinctive!
If I lived in a more rural setting, and was able to get some distance between my home and a recording spot, then I would definitely set up something more permanent.
In the meantime, listen out during the weekend of 4/5 May 2019, or contribute yourself.