For something like 10-15 years now, my main computer has been a laptop. Most recently, a Dell XPS 2015 with an Intel i7-6700 processor, and which I upgraded to 32GB RAM at some point.
But I always struggled with just a single 500GB M2 SSD, with video taking up too much space. Once you’ve got an operating system, Microsoft Office and Adobe Creative Cloud, you’re already getting busy.
Although it was a laptop in form-factor, the reality was that it didn’t go out with much. If I needed a laptop for travel, I have other options – most recently a Dell XPS 13 with an Intel i7-10510U processor. So a few generations newer (Sadly, I will be stuck with 16 GB of RAM because unlike the XPS 15, that’s not user-upgradable in the XPS 13 range).
As more of my kit became capable of shooting 4K, video editing in Premiere Pro, and especially using After Effects, became more and more painful.
To be clear, the XPS is still an excellent machine. I recently replaced the battery and it will continue to serve me well. But the time had come to get a new computer, and this time I was going to build one.
It’s been a long time since I built a computer, and even then, it was actually a partially built system. The processor, motherboard and RAM had already been installed in a case. I added other features, but I basically had a ready-made system.
This time, I would be building from scratch. PC building isn’t exactly hard these days. You buy a kit of parts, and just have to make sure that everything is compatible. Then you’re away.
So where do you start?
Well you need to know two things:
- A good idea what you want to do with the PC
- A budget
You can build a PC for around £500, and beyond that the sky’s the limit. I set myself a £1500 (ish) budget and my starting point was Reddit’s “Build a PC for me” board. The idea on that board is that you answer a series of questions, and smart people will get back to you with recommendations. So I posted a request for a build based on 4K video editing in Premiere, photos in Lightroom and Photoshop, and audio editing in Audition.
Games weren’t really on the agenda, and I would save money in not getting the latest and greatest graphics cards. But the card I ended up with is pretty powerful.
I wanted it to be fairly quiet – it’ll be running in my living room – but I wasn’t going to go to the expense of water-cooling. This is an air-cooled machine.
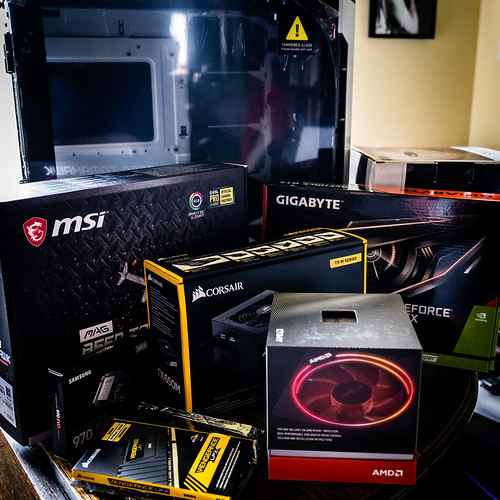
So here’s what I ended up going for:
Processor
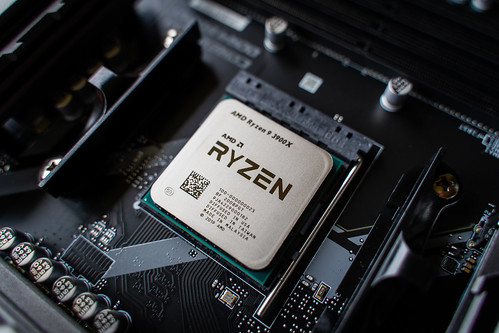
These days, that means Intel or AMD. I’ve been pretty much exclusively Intel over the years, but AMD’s Ryzen processors really have taken over to a large extent, especially in terms of value. Reddit suggested the Ryzen 9 3900X. This beast has 12 cores and 24 threads, and while not as fast as the top end 3950X with 16 cores and 36 threads, it offered a good level of value compared to others. Only the Threadripper line supersedes this. This was the most expensive component in my build by quite a long way.
As I was buying, AMD announced the Ryzen 9 3900 XT which adds a little more oomph. But that would have cost another £80-£100 at launch, and now reports are in, I could probably generate the same gains by overclocking my own system (I’ve no idea how to do that incidentally, but I know that I can do it if I want to look into it).
As ever with computers, there’s never quite a right time to buy. There’s always the next generation of components or whatever, just around the corner.
Motherboard

Once you’ve chosen your processor, you need a motherboard that will work with it. The Reddit group chose a B450 motherboard, but I waited a few weeks because the B550 motherboards were coming out in June. Although a little more expensive than their predecessors, they offer a bit more future-proofing, being capable of accepting the next 4th gen series of Ryzen processors which are due at the end of this year or the beginning of next (Although many B450 boards should get firmware to accept these too). While I’m probably not going to rush to replace a pricey component that I’ve just bought, having the flexibility to do so is nice.
They also have PCIe Gen 4, which is another bit of future-proofing without needing to replace my motherboard.
The other option was to go for an X570 motherboard. These have more features than the B550 series, but come at a price (The naming of these chipsets is completely random and crazy incidentally. You have to do some research before you start just to understand waht the various ranges are. Intel has its own random letters and numbers too.).
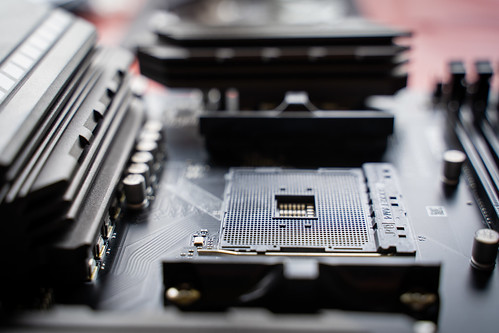
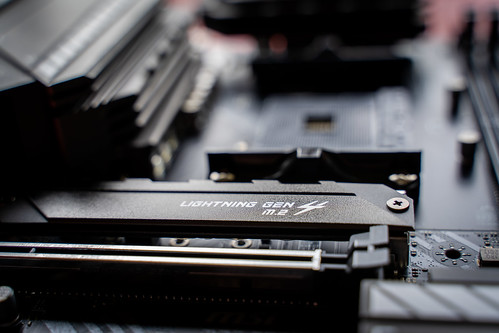
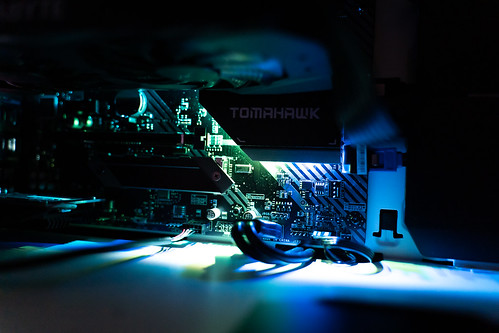
I ended up with an MSI MAG B550 Tomahawk. It’s an ATX sized board, which means a “normal” desktop computer size, and it comes with two M2 NVME drive slots amongst other things. It was also important to me to have a front USB-C port. Not all the B550 motherboards out there right now have a front USB-C connector on them. So if you buy a case like the one I’d be getting, you could be left with a defunct socket if you’re not careful. The front USB-C port on this motherboard is 3.1 Gen 1, but you get 3.2 Gen 2 at the rear (Basically Gen 2 is twice the speed of Gen 1). USB naming is also completely mad! I just wanted a fast port from which I could ingest data from memory cards etc. Strictly speaking I should use the rear port for fastest ingest of data, but that’ll be a bit inconvenient once the PC is in place under my desk. A long USB-C extension cable could be the answer.
Memory

This is relatively straightforward. I got a 32 GB pack of memory in 2 x 16 GB sticks. It runs at 3600 which is plenty fast, and I can easily add in another two sticks to get 64 GB, after which I’d have to replace them all for 32 GB sticks to get the maximum 128 GB of RAM that the motherboard can take. I think 32 GB will be plenty to be getting on with. No fancy RGB lighting on these sticks.
Graphics

This is where I stuck with the Reddit suggestion of an Nvidia 1660 Super card. I got a Gigabyte one with 6GB RAM because it was cheapest. This is a GTX series card rather than the newer RTX series, but there’s a price saving and I’m not trying to get 60 frames per second in the latest games, running at 4K with everything turned on. Plus, I understand that the processor I have is as important as graphics for good video editing speed. As ever, there’s yet another range of RTX 3000 cards coming soon from Nvidia – the Ampere. But I’m happy with what I got.
Power
This turned out to be the trickiest component in my build. There’s something of a Covid-related shortage of power supplies at the moment, and prices are high. All the YouTube PC builders note it, and I found it quite hard to find something in stock. My system shouldn’t use more than 400W, but I’ve got 650W Gold Corsair power supply. The “Gold” label refers to the power supply’s efficiency – i.e. not using more power than is necessary and wasting the energy. So I’ve got lots of headroom, and it shouldn’t cause all the lights locally to dim when I’m rendering.
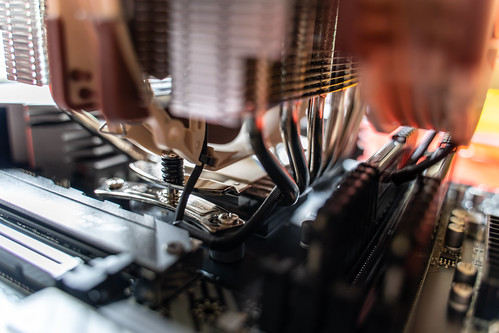
Cooling
Cooling is an important part of PCs and an area that desktops absolutely trounce laptops. Far too many laptops – especially super-thin Apple Macs – are thermally limited since they can’t dissipate the heat easily enough.
My Ryzen processor came with a stock fan which could be fitted on top of it, but I went with a suggested Noctua NH-D15 which is a beast. It’s an air-cooler (no water cooling here) and comes with two fans (my case, as you will see, has more).
This was the hardest part to fit, and it nearly clips the top of the RAM it’s so vast. But good cooling is key to efficiency and making sure there’s no thermal throttling.
Storage
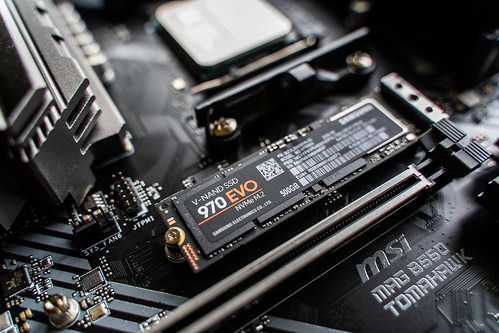
This is where it gets complicated. My starting point was an NVME M.2 SSD. I went for a superfast Samsung EVO 970 500GB stick. This will have my operating system – Windows 10 – and my apps. But most other things will `not be stored on this.
Alongside it, I also bought a Seagate Barracuda 2TB. This will be main storage. I use both Dropbox and OneDrive, so it will sync them. It will also store most semi-permanent data on my drive. Just not apps.
But having got these, I remembered that I had two 3TB disks kicking around from an upgraded NAS drive. They needed reformatting, but my case had space – it came with four “caddies” to mount hard drives. So I popped them is as well. I now had 8TB of onboard storage on spinning disk, plus another 500GB SSD for the OS and apps!
I wasn’t finished. You see programs like Premiere and After Effects really work better if you cache data, and do it on a separate drive. So a bespoke SSD drive just for caching seemed like an option. A Samsung EVO 860 250 GB SATA SSD drive was the answer. It will be purely for caching data. Nothing else will go on it. 250GB should be plenty. There’s room in my case to mount three SATA SSDs in total as well as the four hard drives. Big roomy cases are great for this.
But then there’s the project space. Yes- I’ve got 8TB of space spread over three drives, but for working on the data “live” when you’re using Premiere Pro or After Effects, an SSD drive is better, and my motherboard has a second NVME M.2 SSD slot. So I got a WD Blue SN550 500GB drive for that. This will look after project files while I’m working on them. It’ll also house local photos in Lightroom while I’m again working on them. (The second NVME M.2 slot isn’t quite as fast as the primary, and there’s an argument for switching drives for the OS and apps, but it’ll be negligible in reality).
My workflow is basically that I will capture photos and video, temporarily store and work on them in this projects drive, with the apps on the primary drive, and the cache on the SATA SDD. Then when I’ve finished, projects will be offloaded to other drives – usually my NAS drive. There’s also off-site storage too.
It should be noted that I needed some extra SATA cables to plug in all these drives! But the motherboard comes with six SATA slots, four of which I’m now using, alongside the two NVME M.2 slots.
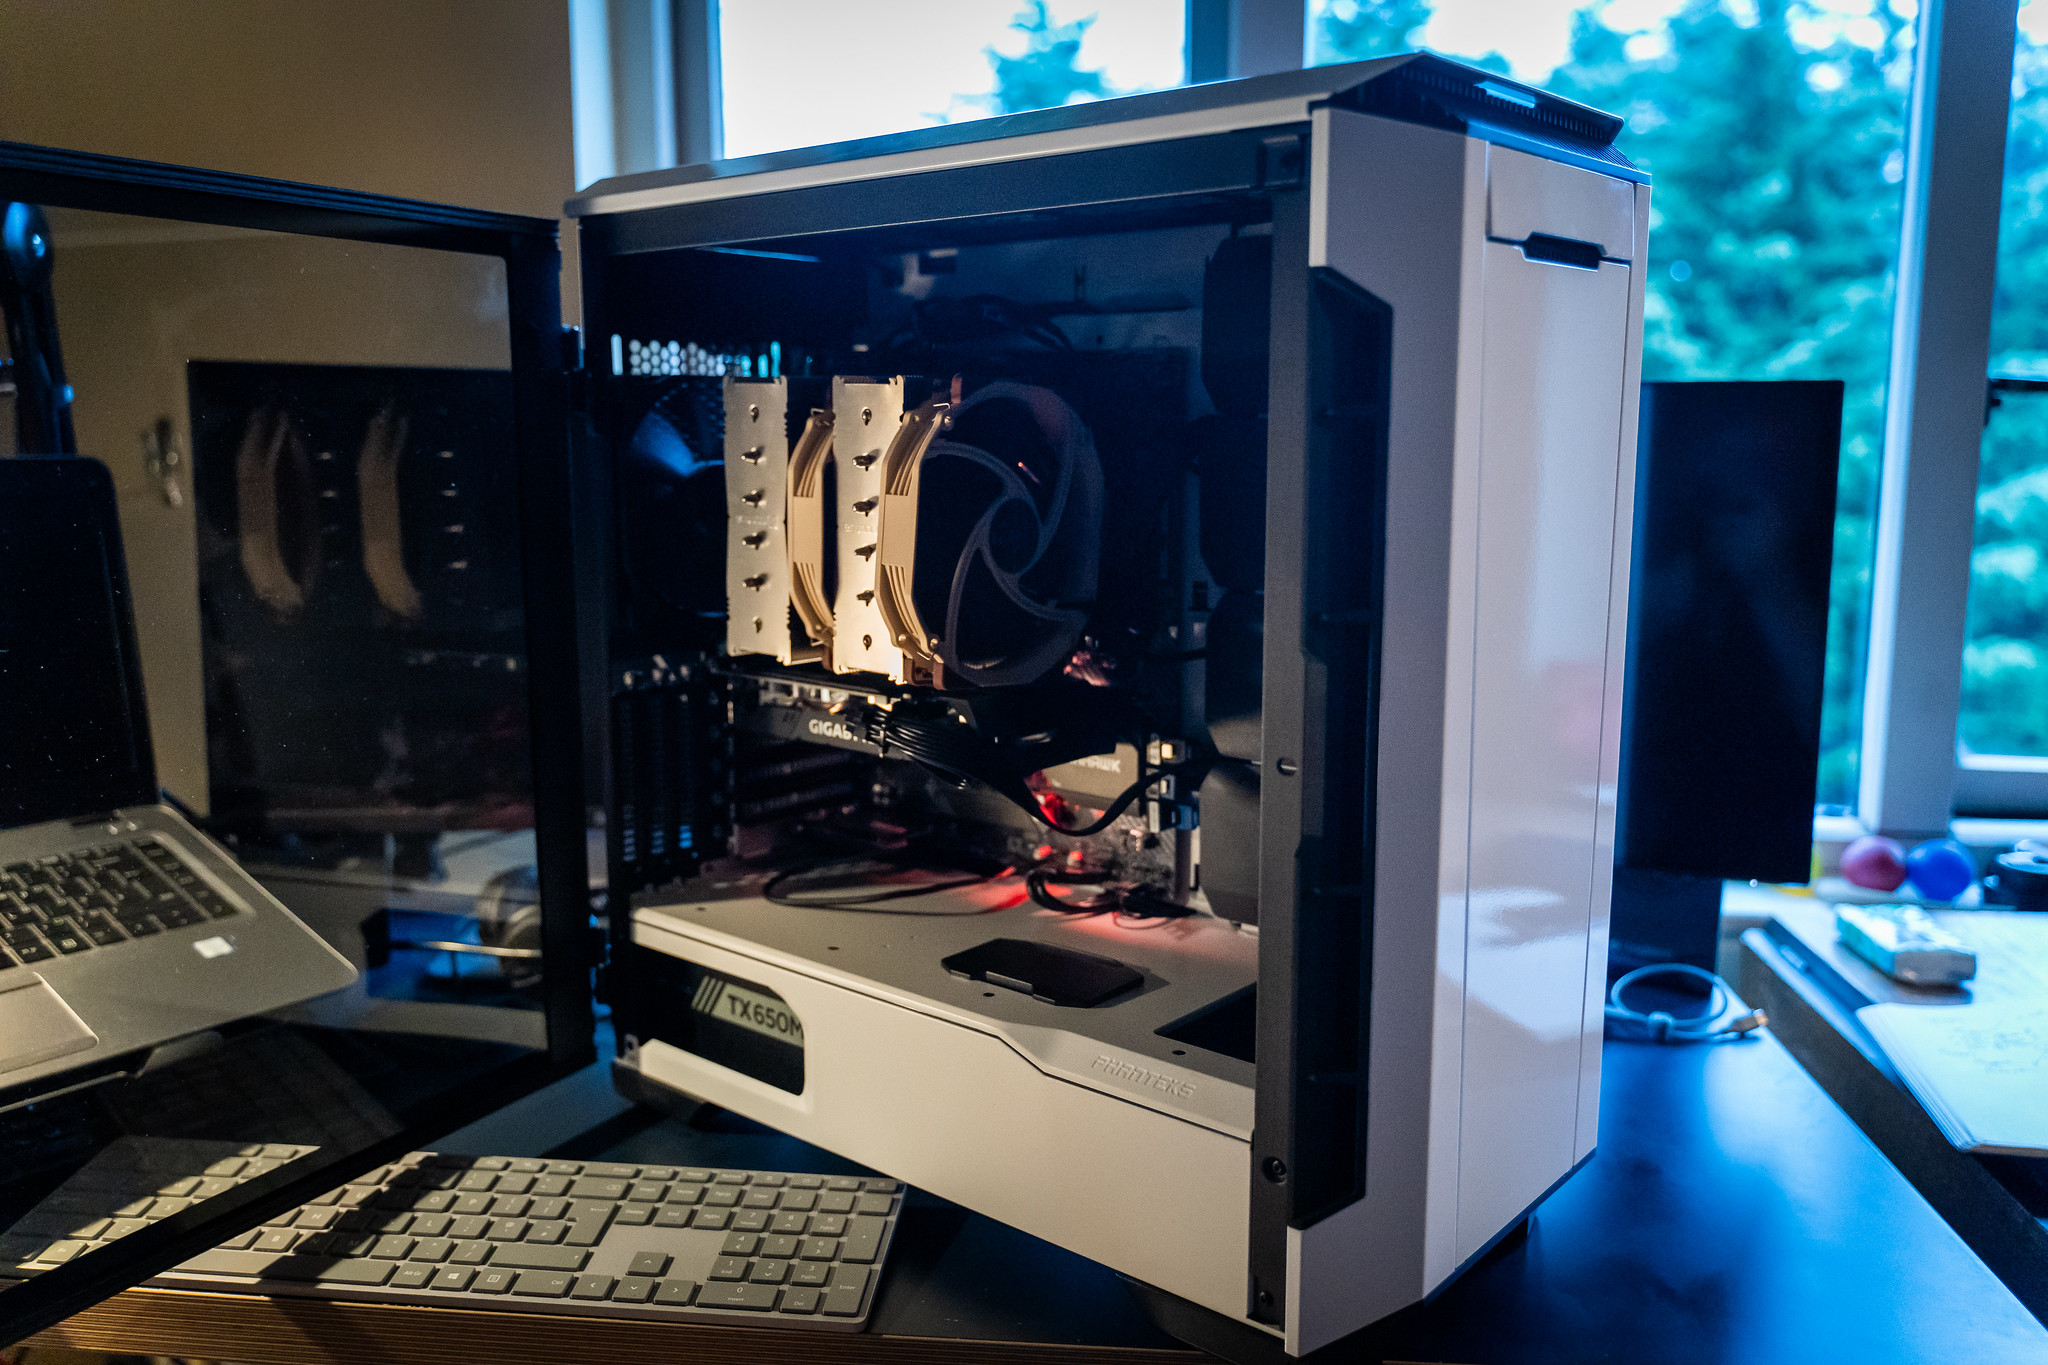
Case
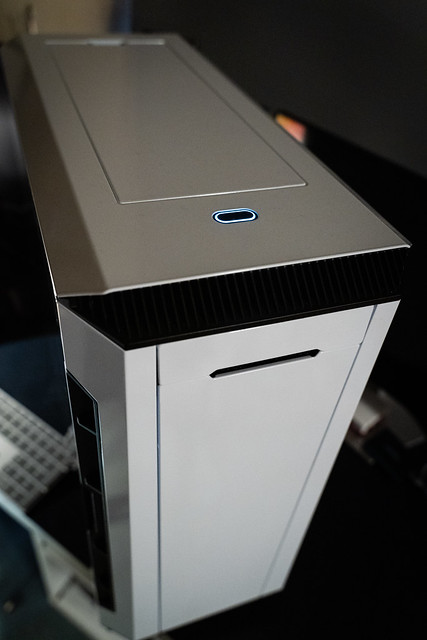
I ended up with a Phantek P600S case. It’s a bit of a beast, but there’s loads of room to work in and run the wires neatly. Plus it has good air cooling options. The case itself came with three relatively quiet fans (although I could replace them with quieter ones), and with the two on my processor, that’s five in total. Two fans pull air in the front, and one vents it out the rear. You can also lift off the top to let heat out during intensive sessions, as well as opening the front where a panel comes open to reveal a mesh beyond. With everything closed, the PC runs nice and quietly.
I got the white version of the case, which has a certain Star Wars Stormtrooper vibe to it. Ordinarily I pick black by default in just about all my tech, but I was pleased that I decided to go white in this instance.
And yes, it has the tempered glass panel on one side, but frankly, beyond the photos on this page, the internals will rarely be seen since it’ll all go under my desk.
LEDs
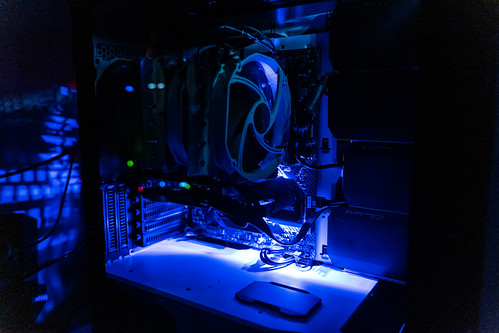
I’m not really interested in these, so none of my RAM, case or fans have them. The motherboard does – and it can be adjusted in software or the BIOS. It’s fine, but as I say, it will mostly be out of sight given where the PC will sit. The lights are useful during the build to prove everything’s work though.
Other Things
The motherboard doesn’t have WiFi or Bluetooth, and at first I didn’t think that’d be a problem since I’ll be using it via ethernet (it has two ports – one gigabit and the other 2.5 gigabit, not something I can use with my current router). But I realised I needed Bluetooth since my keyboard and mouse work that way. A decent, but inexpensive PCIe card fixed that, once I’d returned the first card which came with WiFi but not Bluetooth. D’oh. For what it’s worth, the card has WiFi 6 and Bluetooth 5, so I’m nicely up to date. But given the PC sits about three feet from my router, I’m unlikely to use it much.
Down the line, I may also pick up a Firewire card because I’ve still got a massive Mini DV capture project to do – ingesting all my old Mini DV video tapes.
Building the PC
This is the fun part.

It’s actually really easy to build PCs these days, if you’ve got the parts right. Putting the processor in the slot on the motherboard is a breeze, as is screwing in NVME M.2 drives. RAM just slots in likewise. The processor cooler was trickiest to fit as mentioned and required some thermal compound (it comes with the Noctua cooler) which ensures good contact between the processor and the cooler. This all screws to the motherboard. You just need to make sure that you use the right brackets in the cooler set with your motherboard. The mounting is slightly different with AMD and Intel chipsets, although my cooler came with both sets of screws and brackets.
Then you mount the motherboard to the case which was made much easier by the excellent little plastic case of screws that Phantek supplies – so much better than random plastic bags of screws. Seriously, this is lovely and I’m hanging onto it.
The only tool you really need for this is a Philips screwdriver, and Noctua even provide a long one to screw down their cooler.
My motherboard also came with a built-in “back-plate” – older cheaper motherboards have this separately. It’s no real fuss, but building it in is neater.
Once mounted in the case, it’s then a question of installing the power supply in the base of the case and running cables neatly between it and all the components. My power supply is “semi-modular.” That means that aside from the motherboard and CPU cables, you could choose which cables you needed to run depending on your own computer’s configuration. Cheaper power supplies have all the cables “built-in” and you have to tuck unused ones away neatly. Fully modular power supplies mean that every cable is fully removable at both ends. My case had a neat bottom partition to keep the power-supply. The hard drives sit towards the front of this space.
If you use your motherboard’s manual, finding the right place to plug each cable in is easy. You also need to plug in various cables from the case so that the front USB slots work, as well as any audio ports there, and the power button. Many of the cables can only attach in one orientation and are unique to that type of connector. All of this makes life a little easy. But if you can build a Lego model, you can probably cope with this.
Then you mount the various hard drives and SSDs, and neatly run the cables from these to motherboard and power supplies respectively. Running the cables neatly can be easier said than done. Some people get quite anal about this, but my case helped a lot, with lots of velcro straps keep cables running straight, and most of the “tangle” is in around the power-supply, or hidden out of view behind the motherboard.
Finally the graphics card slots in, and it too needs powering.
Then you’re ready.

The first thing you want to do is get the computer to “post.” That is show that it’s working. Plug a monitor into it via the graphics card’s HDMI or DisplayPort slot and power it up. Remember, you may need to use the case’s power button to turn it all on. That last bit definitely caught me out for a moment.
Fans should turn, and any LED lighting should come on. And on the monitor you should boot in the motherboard’s BIOS. This is where you can do all kinds of things, but mostly now just check that the motherboard is seeing your CPU, RAM, drives and so on. Enabling XMP here is a good idea – it lets you maximise your RAM speed without too much other interaction.
If that all works, then it’s installing Windows (or Linux) – probably via a USB stick. I didn’t have to change any defaults in my BIOS to do this. But basically you need the machine to see your USB sockets as a “bootable device” so that you can install your operating system.
Note that Windows licensing is a whole thing of its own. I bought a legitimate license via Amazon who were slightly cheaper than Microsoft direct. I didn’t have any previous licenses I could reuse. There are all kinds of cheaper licenses on the internet, but it can all be a bit hit and miss, and the legality of some of them can be questionable. I took the safer, more expensive route.
Then it was a question of installing Windows fully and any drivers. Windows picked up absolutely everything, and I only really needed to install drivers for my graphics card via Nvidia’s site.
There are loads of YouTube videos that show you how to build a PC, but I especially recommend those from Paul’s Hardware. He has a three part series on building a PC, with parts two and three in particular proving useful (for part one I think some of his more recent “monthly build” videos are better since they’re more up to date).
If you really want a superb PC for video and audio editing, then Mike Russell published this video just after I’d finished my build. He uses even faster processors, more RAM, and much more expensive graphics cards. His system will fly. But it did cost a bit more!
Conclusion
I’m really pleased how everything went, and how smoothly it all went too. I’ve not run into any issues surrounding things not working. Everything has been flawless.
The only odd thing I did find was when I plugged in a small USB-C SSD flash drive I have (a Samsung T5) and the machine wouldn’t see it as a drive. It worked via a regular USB-A slot, but in the end, just replacing Samsung’s USB-C to USB-C cable did the trick. That’s an oddity worth knowing.
It’s worth keeping an eye on MSI’s site for BIOS updates. As I write this another has been published. Since I’m using such a new chipset, this perhaps isn’t too surprising.
The biggest pain is the reinstalling of everything you had on your last computer. I steadily worked down a list of all the apps I had before, and which of them I wanted to install on the new PC. Yes – there are some usernames and passwords to dig out, but I probably have more than most to install anyway.
Plus, Adobe and Microsoft have made their apps really easy to install.
The worst bit of all that was transferring across all my Adobe Lightroom Classic presets to the new machine. Adobe really need to make installation and re-installation of presets easier!
What about performance?
Well I’m not going to provide yards of test numbers, but I will give one real-world example. I chose a recent video I’d made shot with my Mavic Pro drone in 2.7k.
I went back to my old Dell XPS with it’s Intel Core i7 6700HQ processor and 32GB of RAM. Exporting the 3:47 video, which included some 3D camera tracking in After Effects, plenty of colour correction and dissolves, took 17:03 minutes.
On this new PC, the same export took 4:50 minutes. A vast improvement!
More to the point, scrubbing the timeline is pretty much painless, and things just become much easier to do. I’m not even sure that I’m pushing the graphics card much.
So yes, it’s all been a very worthwhile upgrade. I’ve tried a couple of games and they all seem to run smoothly. I’m very tempted by the new Microsoft Flight Simulator, and that might be an interesting test at some point. I’m not sure I’m investing in a flight stick however.
What was great was just how smoothly everything went. I took my time, and basically didn’t run into any problems. As I type I have 64 Chrome tabs open (I know) and the CPU is running along at 3% with 31% of my RAM being used.
The machine runs very quietly as well. You never really hear the fans at all apart from during intensive rendering efforts in After Effects or Premiere.
The only thing I sort of miss is an optical drive because I still buy the odd CD and another long term project will be doing some DVD and Blu Ray ripping. But an external drive will do for those.
In a couple of months’ usage since I built the machine, I’ve found the USB-C front connector essential and I’d recommend that anyone building a new PC finds both a motherboard and case that support them.
The only thing my laptop had (and my XPS 13 still has) is Thunderbolt. That’s rare on AMD motherboards as it’s an Intel thing. But I think it’s more important in laptop than a desktop.
What will upgrade next? There’s really no rush for anything. More RAM perhaps at some point – I’ll keep an eye on prices. And much further down the line, a newer GPU. But for my use, I’m not really pushing my current one at the moment.