Sometime around 1995 or 1996, I bought a Giant ATX 850 mountain bike. This was a rigid bike – not even any front suspension. It had an aluminium frame and 3 x 7 speed chainset.

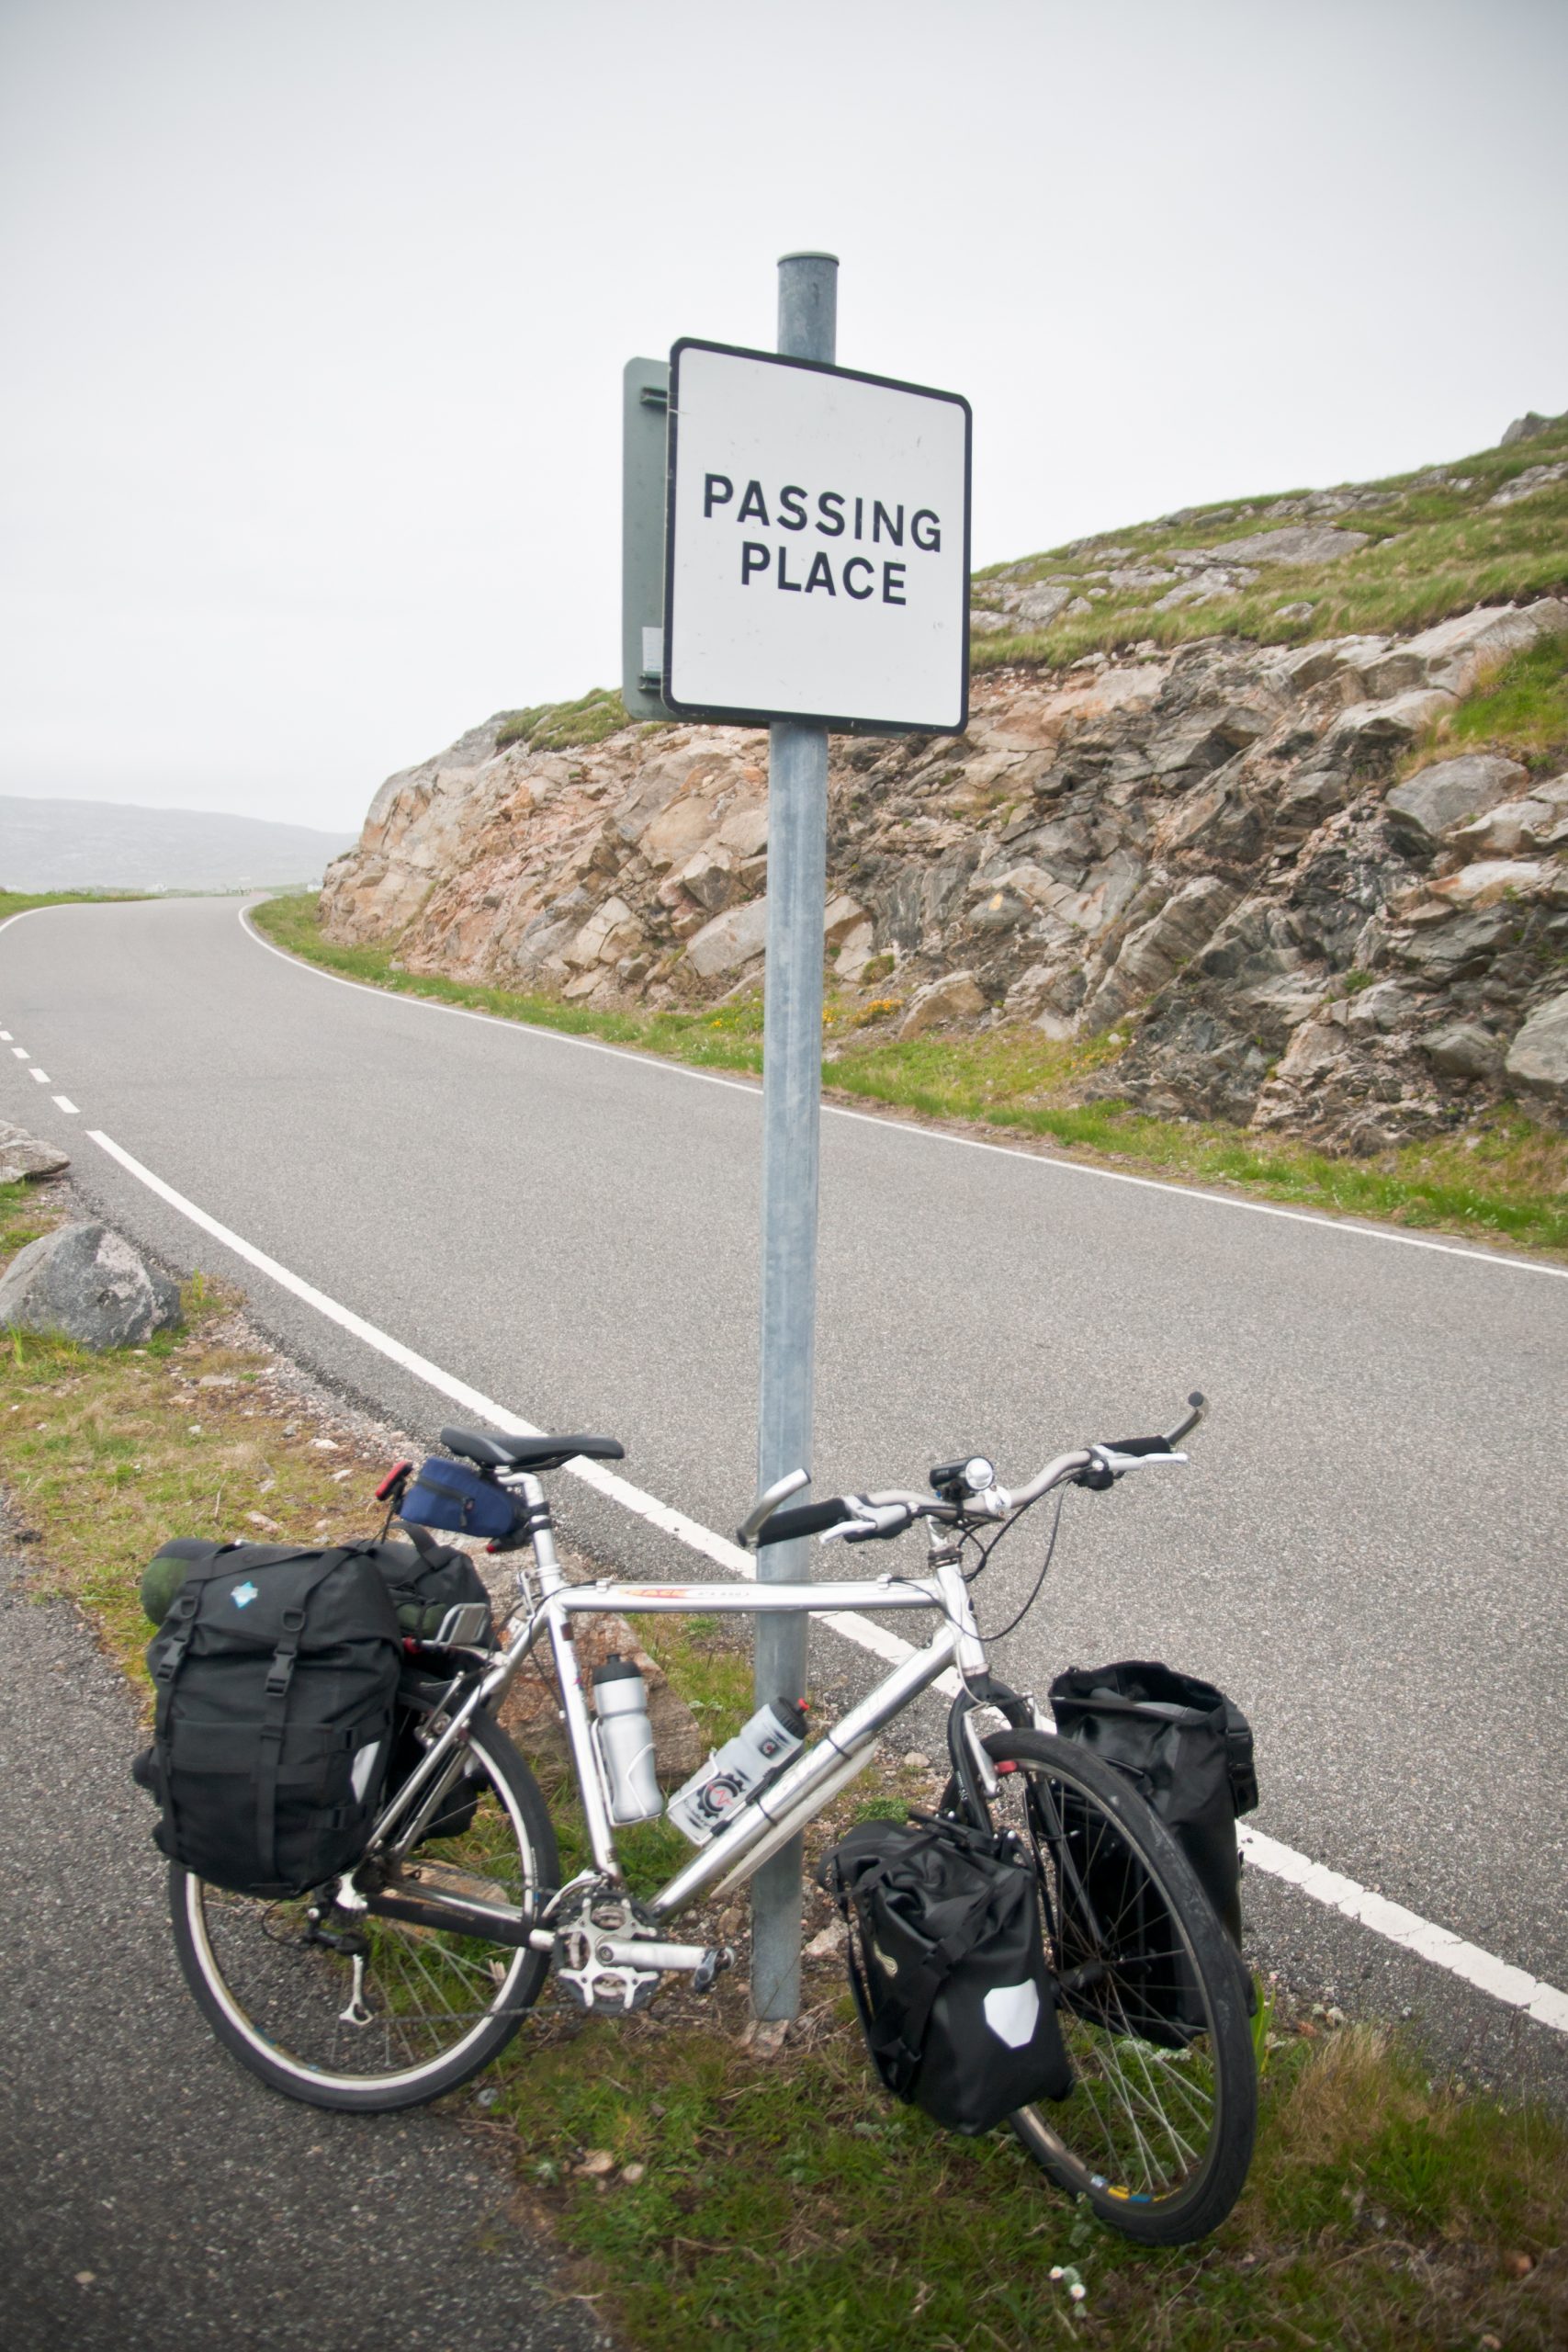
That bike went a lot of places with me. In late 1996, I rode it in the Moroccan Atlas mountains. A year later, it would carry me on the Glasgow to Inverness cycle route. And the bike was still in operation in 2010, when I toured the Outer Hebrides.
Over time, every single component was changed on the bike. I think the only original parts remaining are the front fork and the seatpost.
But sometime after 2010, I stripped the frame down and put it away with a vague notion that I’d do something with it later. I didn’t want to get rid of it. So it sat in my loft, unridden for 10 years.
But recently I’ve had a hankering to try riding a singlespeed bike, and although a 26″ mountain bike frame isn’t necessarily the go-to choice for such a bike, I still liked the idea. And I could resurrect my oldest surviving bike!
I spent some time working out what I’d need to convert it, and gathered together all the parts. In particular, I wasn’t completely sure what gear ratio I should go for. My cycling strength has improved recently, but I do live on a hill, and would want a gear ratio that would let me get up it!
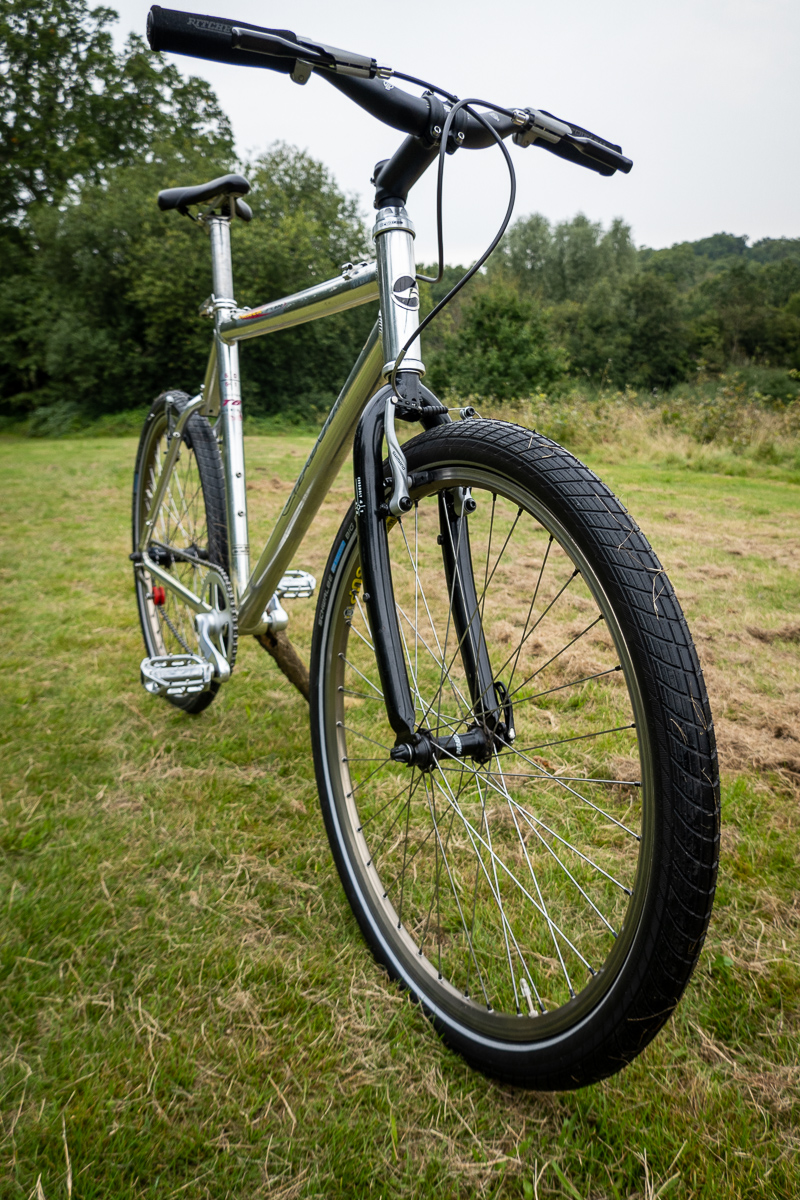
I ended up with a 46 tooth front chainring and a 16 tooth rear chainring. I was going to reuse my old Mavic 217 Sup wheels, and needed some 26″ tyres to go on them. I chose some 2.0″ Schwalbe Big Apple tyres – big bulky tyres, but with smooth grips for road riding rather than off-road. I assume they’re so-named because they work on the pot-hole strewn urban streets of New York.
I used my existing seatpost because there was nothing wrong with it, although I fitted a new saddle.
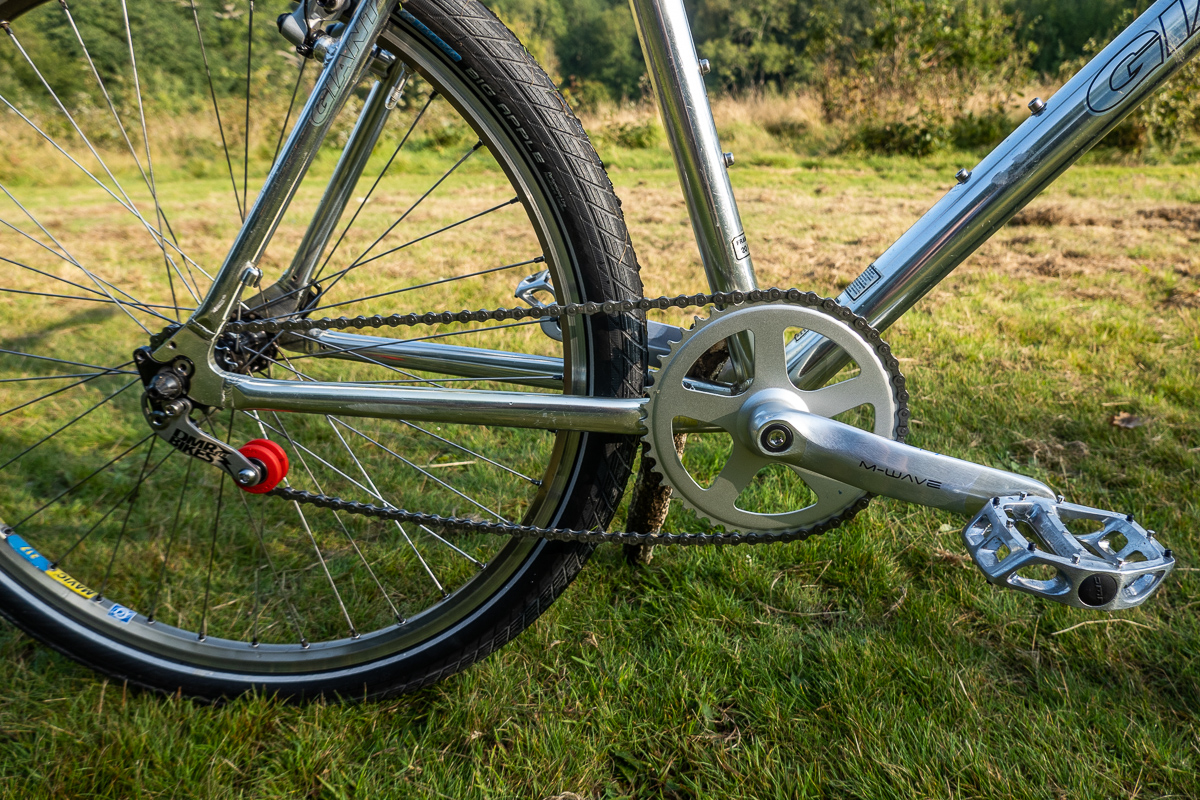
The trickiest bit was the drivetrain. My old 3x chainrings couldn’t be separated, so I needed a new chainring. I settled on an inexpensive M-Wave 46 tooth chainring. I bought a new 123mm wide bottom bracket with a square taper to fit my new chainring. But there was a problem. The chainstay on the frame widened up too quickly and the chainring wouldn’t fit all the way.
My solution was to get a wider bottom bracket. I found a 131mm one – the widest I could find. However, even then, things were just too tight. My workaround was to get a 2mm spacer to fit between the bottom bracket and the frame shell. That did the trick, although the clearance is very tight!
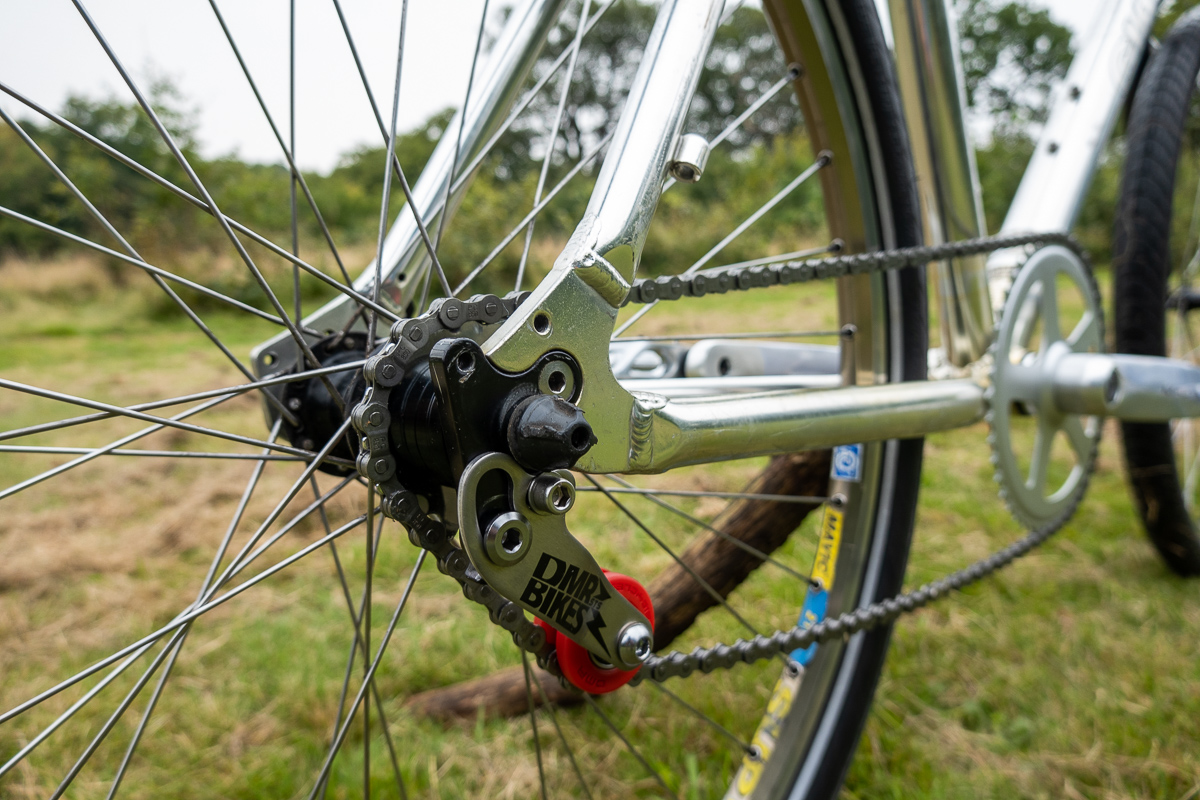
At the back, my wheel accommodated a 7-speed cassette previously. Fortunately, it took that with a spacer, meaning that it would effectively take an 8-11 speed cassette. I was using a kit to convert it to a singlespeed. Then it’s just a question of re-arranging the spacers to get a good chainline, which was straightforward.
My singlespeed kit also came with a chain tensioner. That’s necessary because the chain needs tightening, and my MTB has vertical dropouts rather than rear-facing ones that a proper singlespeed frame would have.
Up front, the old fork was a threaded one, so I fitted a new headset to accommodate that. But to give myself more flexibility, I got a quill-stem adapter than allowed me to fit a broad range of stems to the bike rather than a quill-stem combination piece that the bike would have needed to use otherwise.
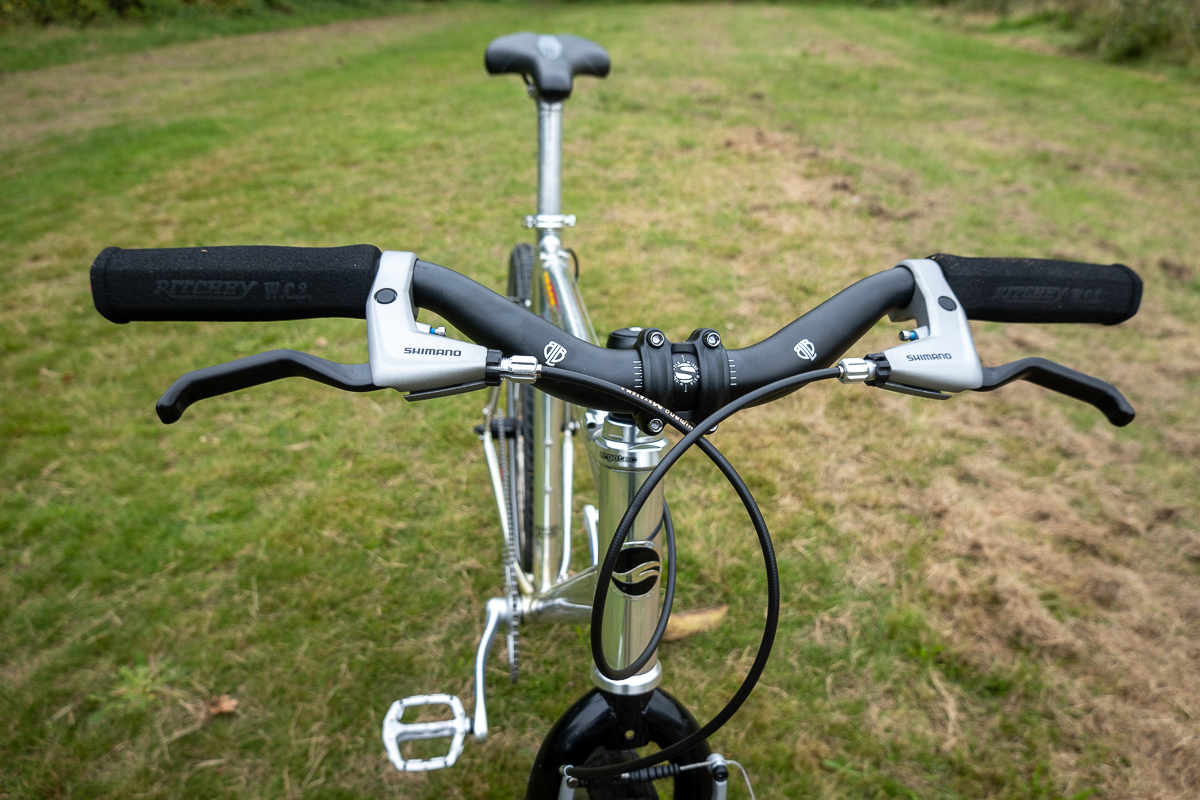
Onto the front of that I fitted a Wiggle own-brand flat set of bars.
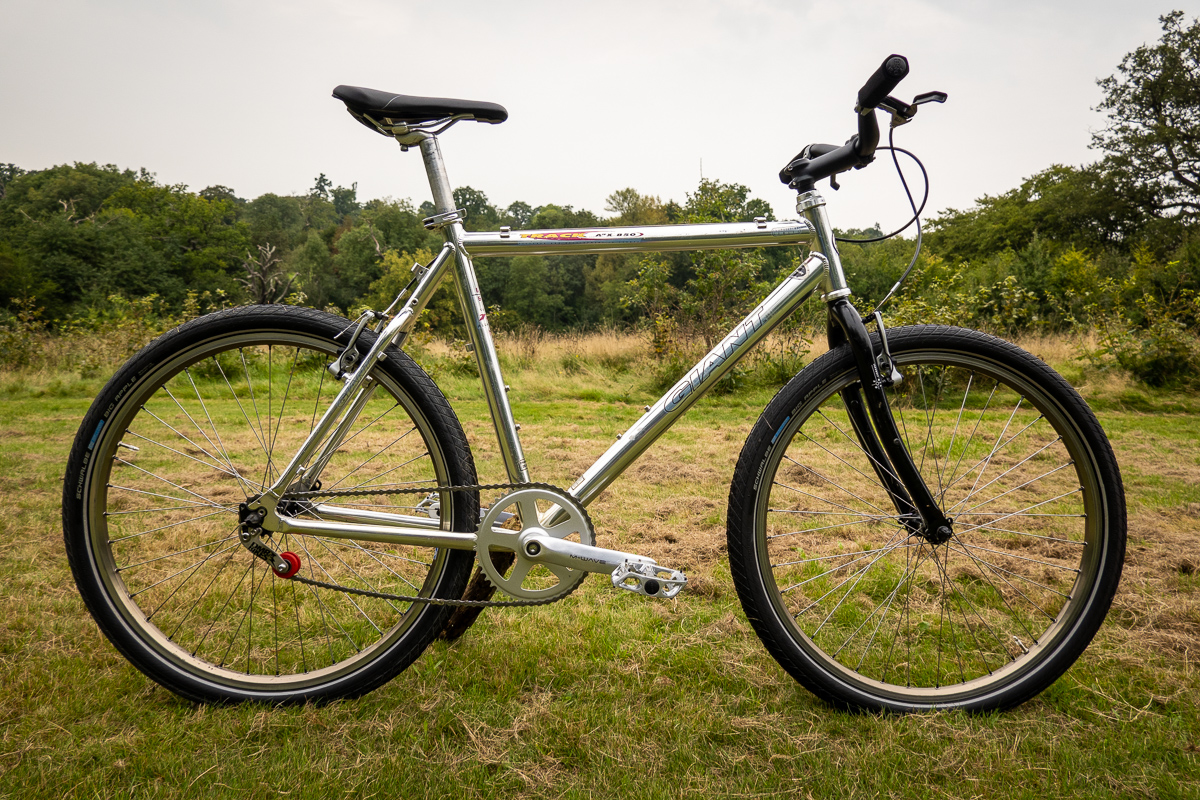
Here was the finished bike!
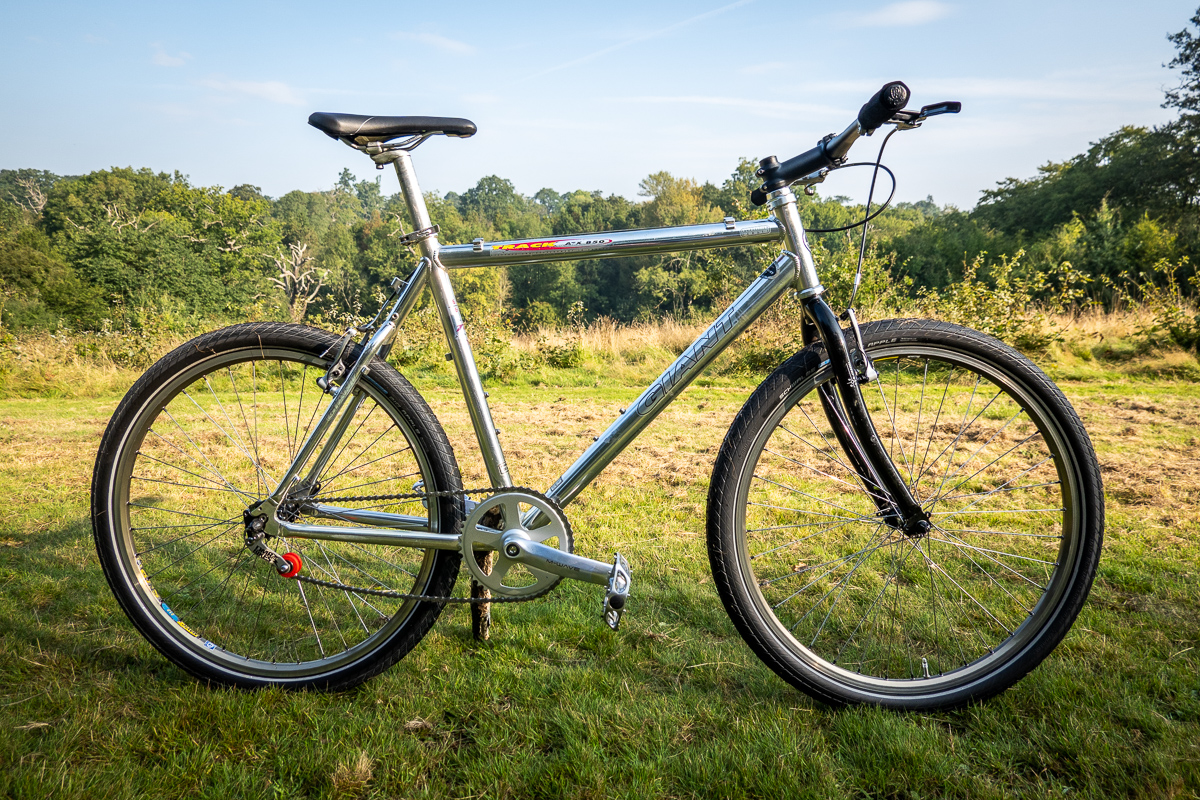

The bike worked fantastically! But there was one small issue. The bike was just too aggressive. The flat, wide bars are designed for an MTB, but this was going to be more of an urban bike.
So I searched around and found an narrow own-brand set of narrow riser handlebars. So I switched them out, and it was much better!
Narrower bars also mean that storing the bike is easier. I tend to loosen the stems of bikes with wider bars to reduce their footprint. But the wider bars also mean that I can get through traffic more easily which is part of the aim of this bike build.
The gear ratio turns out to be pretty good. As you can see from the video above, I can get up local hills on it, and it’s not terrible for the flat either. If I lived in a truly flat area, I’d choose a smaller rear chainring – perhaps a 14 or 13 tooth. Going to a bigger front chainring would definitely require me adding another spacer to the bottom bracket.
Overall, I’m really pleased with how the build went, and I think that I’ll definitely be using this bike as a hack bike to get to the shops etc. The weight isn’t too bad either. Even with bulky tyres and not-especially-light wheels, it comes in at 10.84kg.
But the best thing is that I’ve given an old bike a new lease of life!