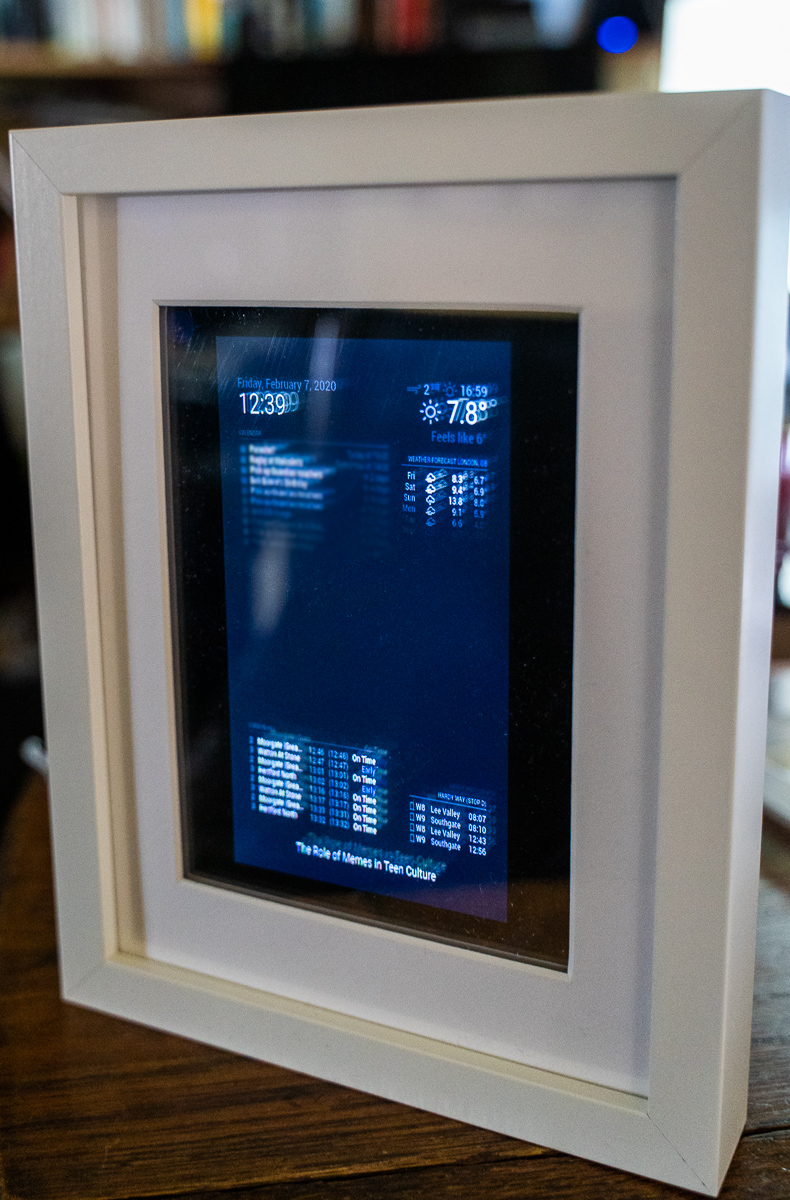
Note: Taking good photos of mirrors is very hard! This photo suggests lots of double images, but in fact they’re not visible to the human eye, and the text is nice and sharp! Nor can you see acrylic marks in the screen. Yes, the mirror still works as a mirror. And yes, I’ve intentionally blurred a portion of the screen here.
Also note that as is the way of these things, everything here was true in January 2020 using a Raspberry Pi 3B+ with Raspbian Buster. Some elements of this may change over time!
Smart mirrors or magic mirrors are pieces of mirror-glass with a screen behind them that can display data. The idea is that they provide useful information in a non-intrusive screen – you probably have mirrors hanging on your wall after all.
The basis of them is a two-way mirror in front of a screen. If the screen is mostly black, with white writing, then the bright parts come through, and you get a mirror for the most part. Commonly people re-purpose old monitors to provide the screen.
The latest issue of the always great MagPi magazine featured a magic mirror on the cover, and when I looked at what was needed to replicate their model, I realised that I had most of the parts already, or could get them inexpensively.
MagPi magazine, incidentally, uploads free PDFs of their publications which is rather generous of them. I like to buy the print versions anyway – but find it useful to go back to PDFs later if needed. Issue 90 which features this project is here. There’s a laser printed cover mounted Raspberry Pi mount (not for this project). You don’t get that with the PDF!
Anyway, the design in MagPi uses a Pi (they used a 4 but I used a 3 B+), the official touchscreen (the most expensive part of this build), a £3.50 IKEA Ribba frame, and a £7.00 A5 sheet of two-way mirror.
(Ribba frames are great for projects because of their depth. I previously used one to make a lightbox).
The whole thing uses MagicMirror2 to produce a good looking display. This is an opensource modular system with various extra functionality developed by a global community.
You obviously also need a micro-USB power supply and an SD card. The official power supply is white and has a mostly white cable, so I’ll use that since my mirror will be wall mounted.
Obviously MagPi magazine gives you most of the information you need. I followed the instructions and I was up and running with no problems. Note that the Pi does still boot to desktop before the MagicMirror app takes over – just wait a few seconds.
Here are a few things that came up for me while I was building my mirror.
Rotate the Screen
Note: I originally used a Raspberry Pi 3B+ for this, and it worked. See update below for instructions for Raspberry Pi 4.
I wanted my magic mirror to be portrait (or vertical) in orientation. To this, from a command line:
sudo nano /boot/config.txtThen add this line to rotate it 90 degrees:
display_rotate=1(Incidentally if you change 1 to 2 you get a 180 degree rotation, and if you change it to 3 you get a 270 degree rotation).
Update mid-2023: I rebuilt my MagicMirror using a Raspberry Pi 4, and the above does not work. The best route is to use the built-in “Screen Configuration” tool to reorient the screen. Either plug a keyboard and mouse in, or enable and use VNC. If MagicMirror is already up and running Ctrl-Esc should get the menu up. Then use Preferences > Screen Configuration. Select the display – DSI-1 for me. Right-hand click on it and choose Orientation > Right (in my case).
Automatic Installation Scripts
In MagPi they give the code for an automatic installer, but when I went to the Magic Mirror installation page they state that as of the start of 2020 they’d removed the automatic installer.
MagPi’s instructions are actually for an installer script, but the linked script on the installation page is actually that of a different user. So I used this version.
Turning Off the Screensavers
You want to do this because otherwise the screen will time out. Touching the touchscreen wakes it up, but with a couple of sheets of acrylic in front of the screen, that may well not work, and in any case, you’ll be getting fingerprints all over your lovely mirror!
Now what I should have done is carried on reading down the installation script page where a second script does the job for you!
bash -c "$(curl -sL https://raw.githubusercontent.com/sdetweil/MagicMirror_scripts/master/screensaveroff.sh)"But since I did it the hard way, I’ll share what I did. I edited two different files and added the same extra lines. First:
sudo nano /etc/xdg/lxsession/LXDE-pi/autostartAnd add:
@xset s noblank
@xset s off
@xset -dpms
Then I edited the very similar:
sudo nano /etc/xdg/lxsession/LXDE/autostartAnd I added the same lines as above. I think only the first changes need to be made, but I changed both and it works for me! In any case, running the script above may be easier.
Editing the MagicMirror Configuration File
What actually gets displayed in MagicMirror comes via the configuration file. To edit it type:
nano /home/pi/MagicMirror/config/config.jsThe installation script should have put a sample version in there. It’s then a question of editing that file to get things to work. Instructions are in the MagicMirror documentation.
I always find it useful to “comment out” unwanted sections of the code rather than just deleting them. I can then easily un-comment them if I want them back. Use // at the start of a line to comment it out. In the Nano editor, the code will turn blue to indicate comments.
For example, I commented out the whole of the the “Compliments” module:
//       {
//             module: "compliments",
//             position: "lower_third"
//       },
That turns off the annoying “You look sexy today” lines that rotate across the mirror!
Adding A News Feed
The default news feed at the bottom was fine, using the New York Times’ RSS feed. But note that while the MagicMirror documentation tells you how to add extra feeds, the example for the BBC feed is outdated. I used http://feeds.bbci.co.uk/news/rss.xml for BBC News Top Stories.
Fixing the Calendar
The default set-up includes a calendar, but to show it working, the system uses a calendar of US public holidays. The problem is that the default *.ics file is now defunct. Either way, you probably don’t want that list in particular. Just go ahead and get an ics link to your calendar from something like Google Calendars (Settings > Settings for my Calendars > [Select calendar if you have more than one] > Integrate calendar > Secret address in iCal format) and paste that into the config file.
Setting Up Weather
The default config file has weather set up, but you do need to register for an API. This all seems to be free incidentally.
Getting set up is all very painless, but as their confirmation emails state, it does take a couple of hours before your API is live. What this means is that even when you cut and paste your various API numbers into the code, weather won’t work instantly. Just wait a few hours!
Transport
I also registered for with TransportAPI because – you guessed it – I want train times (and bus times) on here.
There are two modules to do that. MMM-UKNationalRail can get you train times, and MMM-UKLiveBusStopInfo can (sort of) get you bus times.
The slight problem is that the author of both is no longer using MagicMirror and so isn’t maintaining them. That said, they both seem to work, and the instructions are clear and concise.
For the rail module, the sample code shows you how to get everything working with your TransportAPI details. The only other thing you need to add is your stations’ CRS code. These can be found on the web – here’s a link to a National Rail list.
The issue with the bus code is that by default it doesn’t have live timings. To do that requires the NextBus API which the author says is expensive. I went and had a look, and it seems to be free for the first 180,000 calls in six months, and then £0.96 per 1000 calls. That would seem to be OK, but I realise that one call per minute would exceed 180,000 over six months.
So as things stand, I only have the expected bus times and not realtime departures.
The other thing you need to know for your bus times, is your bus stop’s ATCO code. In London you can find this by visiting TFL’s stations, stops and piers site. Select buses, then pick a bus number that goes to the stop you want. This should list all the stops on the route. Click on the arrow to the right, and you’ll get live bus times for that stop. And in the URL you will see a code – that for London begins 490xxxxxxx. That’s your stop’s ATCO code.
If you’re outside London, then you need to first find your ATCO prefix by clicking here and finding your authority area. For example, if you live in Cambridgeshire your code is 050. The visit here and look for the ‘NaPTAN data by local authority.’ You want the CSV file, and you need to adjust the link to include your code. So for Cambridgeshire it would be: http://naptan.app.dft.gov.uk/DataRequest/Naptan.ashx?format=csv&LA=050
That should give you a ZIP file within another ZIP file. Finally you should have a list of CSV files – one of which is Stops.csv. Open that up in spreadsheet or text editor, and you will have a long list of all the stops in your area (nearly 4000 in Cambridgeshire). Identify your stop, and the code you want is in the first column. Phew!
Update mid-2023: I’ll be honest, and say that I removed all of this in my revised version. The data provider wanted money, and it just wasn’t worth the effort in trying to keep it updated.
Zoom Level [Update]
I didn’t mention this previously, and it’s important if you’re using similar sized screens to me. You may well want to change the zoom level of the browser to make fonts bigger/smaller. The easiest way is to either:
a) Plug in a mouse and keyboard and use Ctrl +/- to set the zoom level
b) Use VNC to do the same. (You will need to go into the Raspberry Pi 4 and turn on VNC. I used SSH via PuTTY and ran sudo raspi-config. Then I went into 3 Interface Options and then I3 VNC which I enabled. That allows me to connect with VNC Viewer on my PC.)
Either way, I did find that while Ctrl- worked to make the font smaller, sometimes Ctrl+ didn’t! If you end up going too small, use Ctrl 0 to reset the zoom level.
Still To Do
There are some things that I still need to sort out.
While the IKEA Ribba frame does encompass the Pi and screen without running into space issues, I found that the GPIO jumper cables’ hoods – that is, the plastic elements that slide onto the Raspberry Pi’s pins – are too deep, and they extend beyond the back of the frame.
So far I’ve not found any “stubby hood” jumper cables, so my workaround is likely to be some of these Adafruit jumper cables with little alligator clips. I’m hoping I can use these in a way that I can mount the frame firmly to the wall.
I plan to use Command Strips to attach the frame to the wall.
Finally, I still want to try to use Crontab to turn off the screen when I’m not around or using it. E.g. Overnight, and during weekdays when I’m out.