The October 2021 issue of MagPi magazine featured Dymtri Panin’s Pico Solar System, and I fancied building one.
The Raspberry Pi Pico is a tiny microcontroller board that costs a whopping £3.60 or so. It is powered by a microUSB socket and it can run bits of code that allow it to control things on a fairly basic level. I can’t claim to be an expert, but since it’s release earlier in the year, I’ve played around with them a little, and this was one of the first things that looked quite interesting.
Now Dmitri has a Github that, combined with the piece in MagPi (available as a free PDF), should be enough to build your own version. That would all seem to negate the need for me to write this. But I was using a Windows 10 computer to set things up, and I did run into some issues. So, I’m going to build on the information Dmitri has provided to tell you what you need to do, right now, in December 2021. It’s entirely possible that new releases of software will negate the issues I came across, or introduce newer ones, but let’s crack on.
Hardware
- Raspberry Pi Pico (Pimoroni – £3.60)
- Precision RTC DS3231 (Pi Hut – £13.50)
- Pico Display Pack (Pimoroni – £13.50)
- Pico Header Pack (Pimoroni – £1.50)
Optional
- If you don’t have a soldering iron, or you don’t want to do any soldering you could replace the Pico and Pico Header Pack with a pre-soldered Pico (Pimoroni – £6.00)
- I’m going to assume that you already have a microUSB power supply, but here’s the official Raspberry Pi one if you don’t (Pimoroni – £7.20)
Prices correct at time of writing.
Assuming you have the ability to solder, you’re looking at a total cost of around £32 for the project.
Assembly
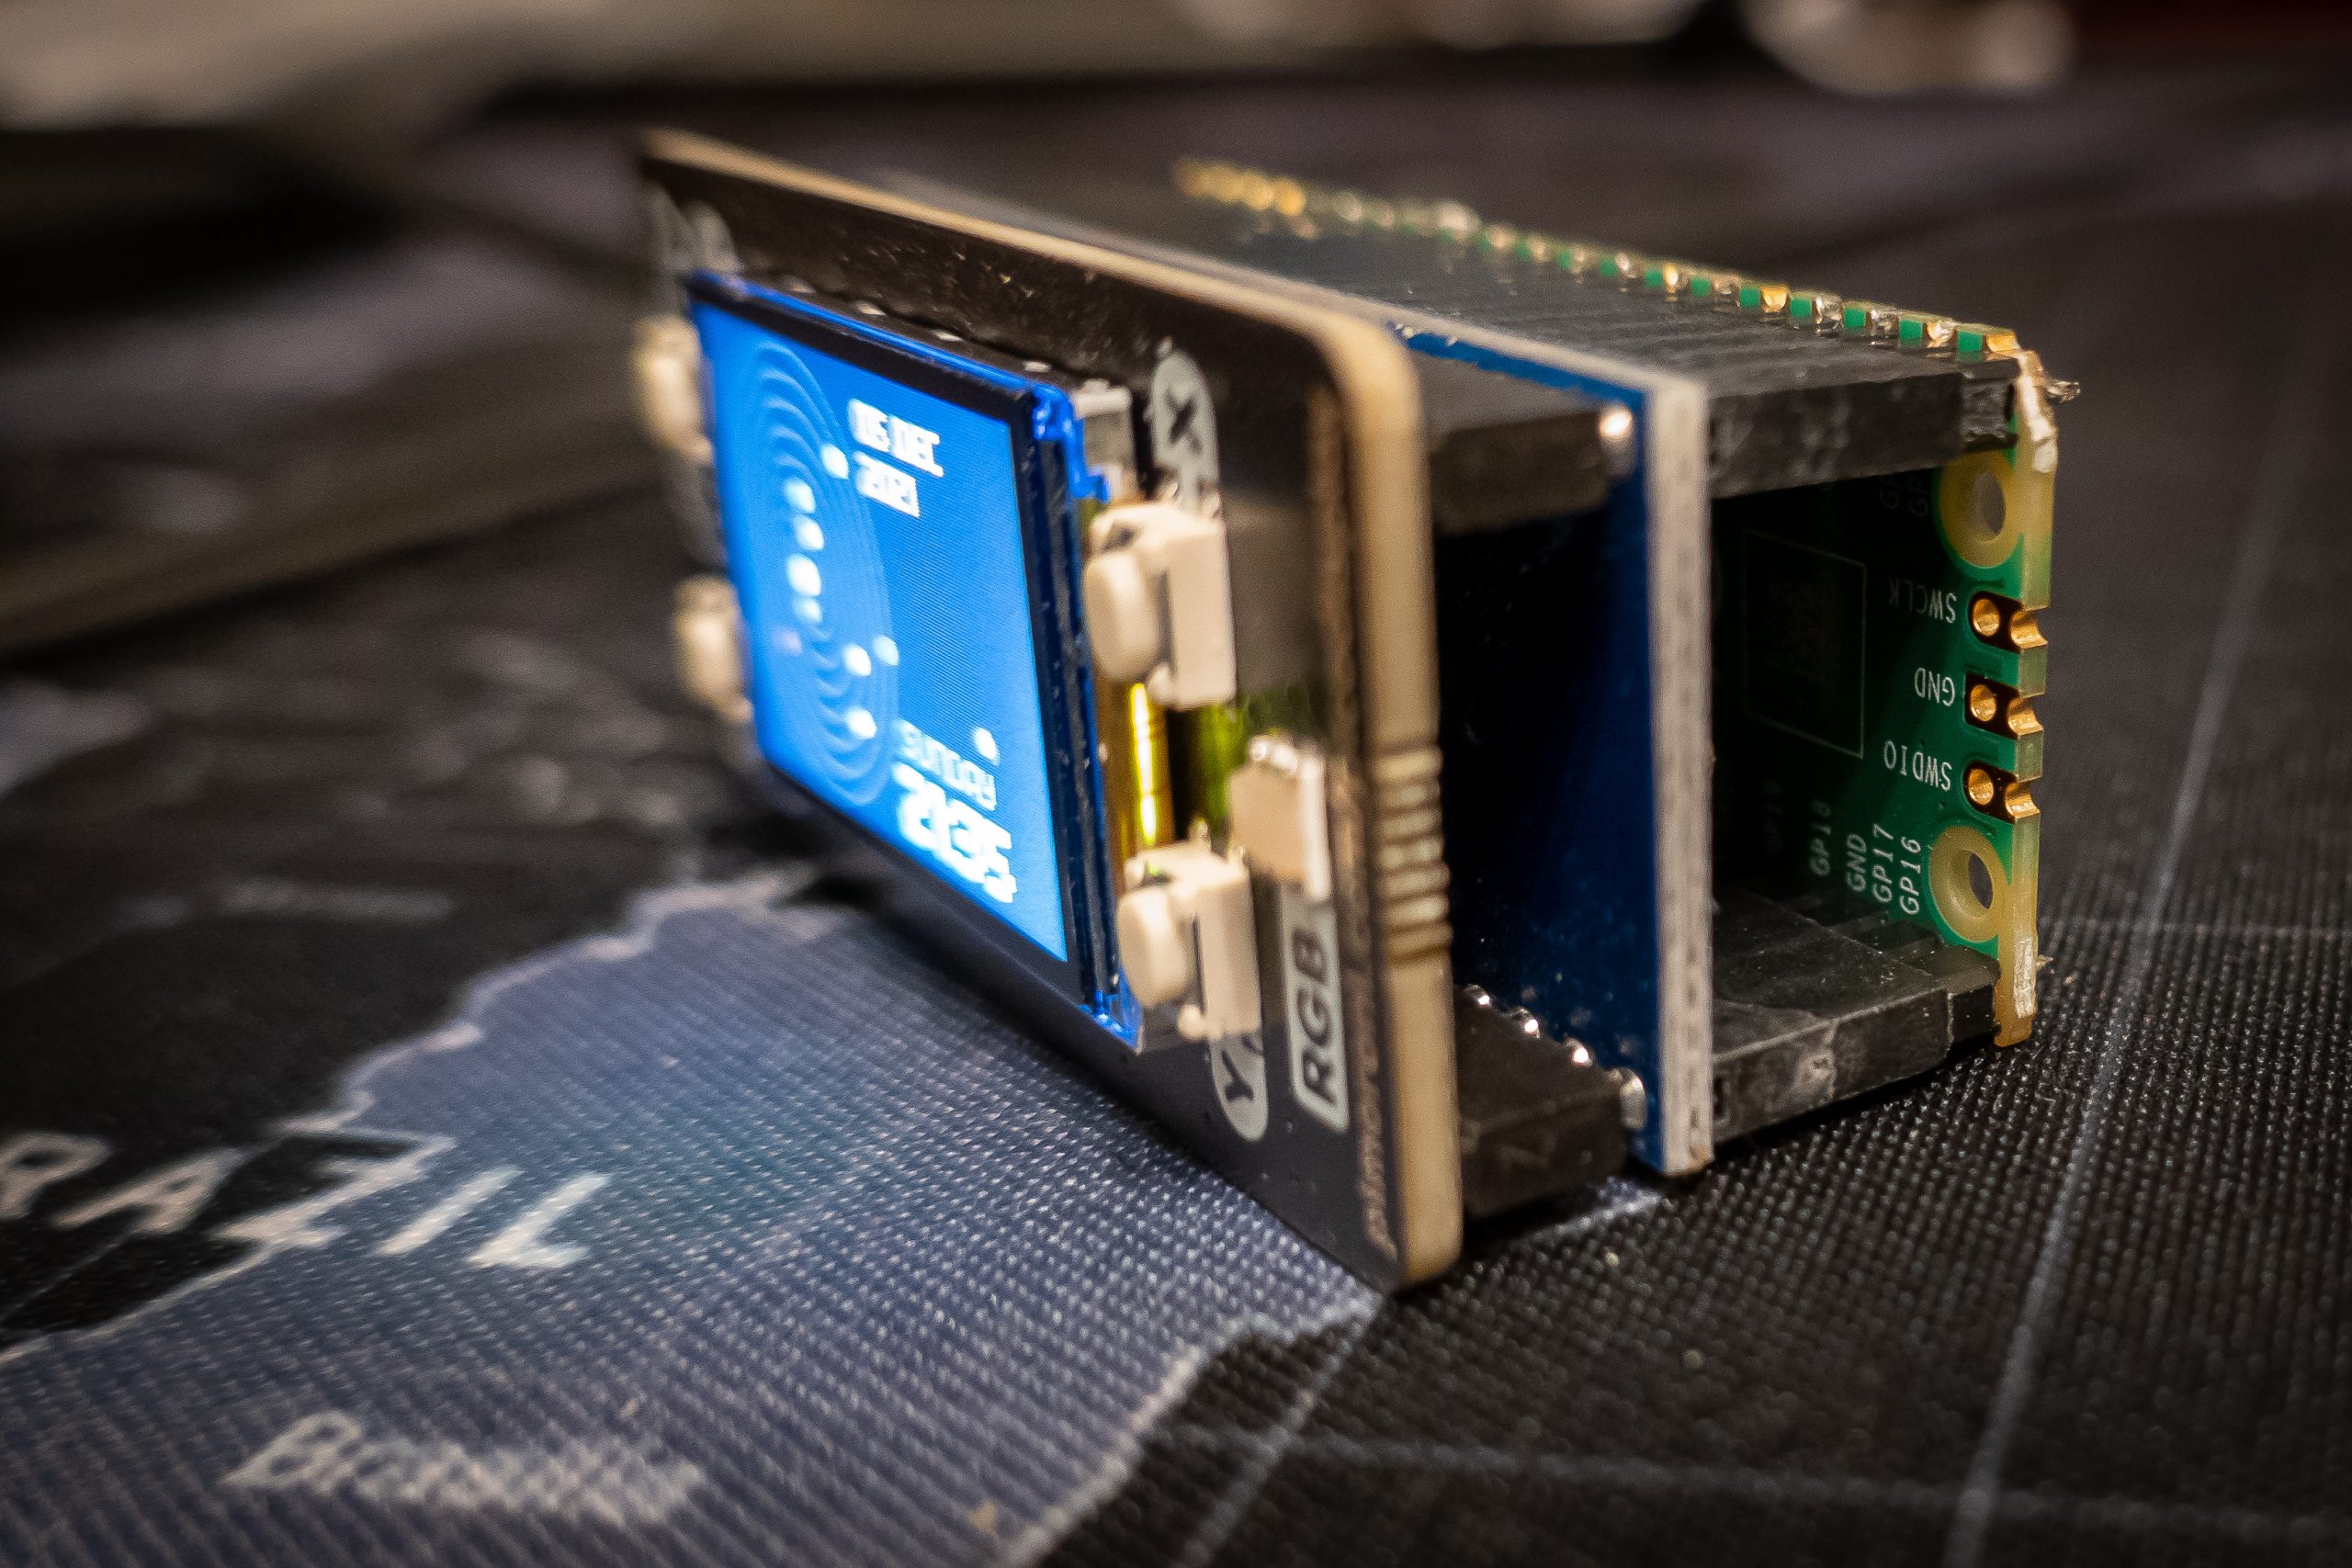
Solder the headers onto the Pico. I found this easiest by inserting the long ends into the Precision RTC unit with the battery on that unit facing upwards. Then place the pico with the Raspberry Pi logo facing upwards and resting on the shorter ends of the header pins.
In fact, getting things the right way around wasn’t made clear in any of the documentation I read, so just to be clear it goes like this.
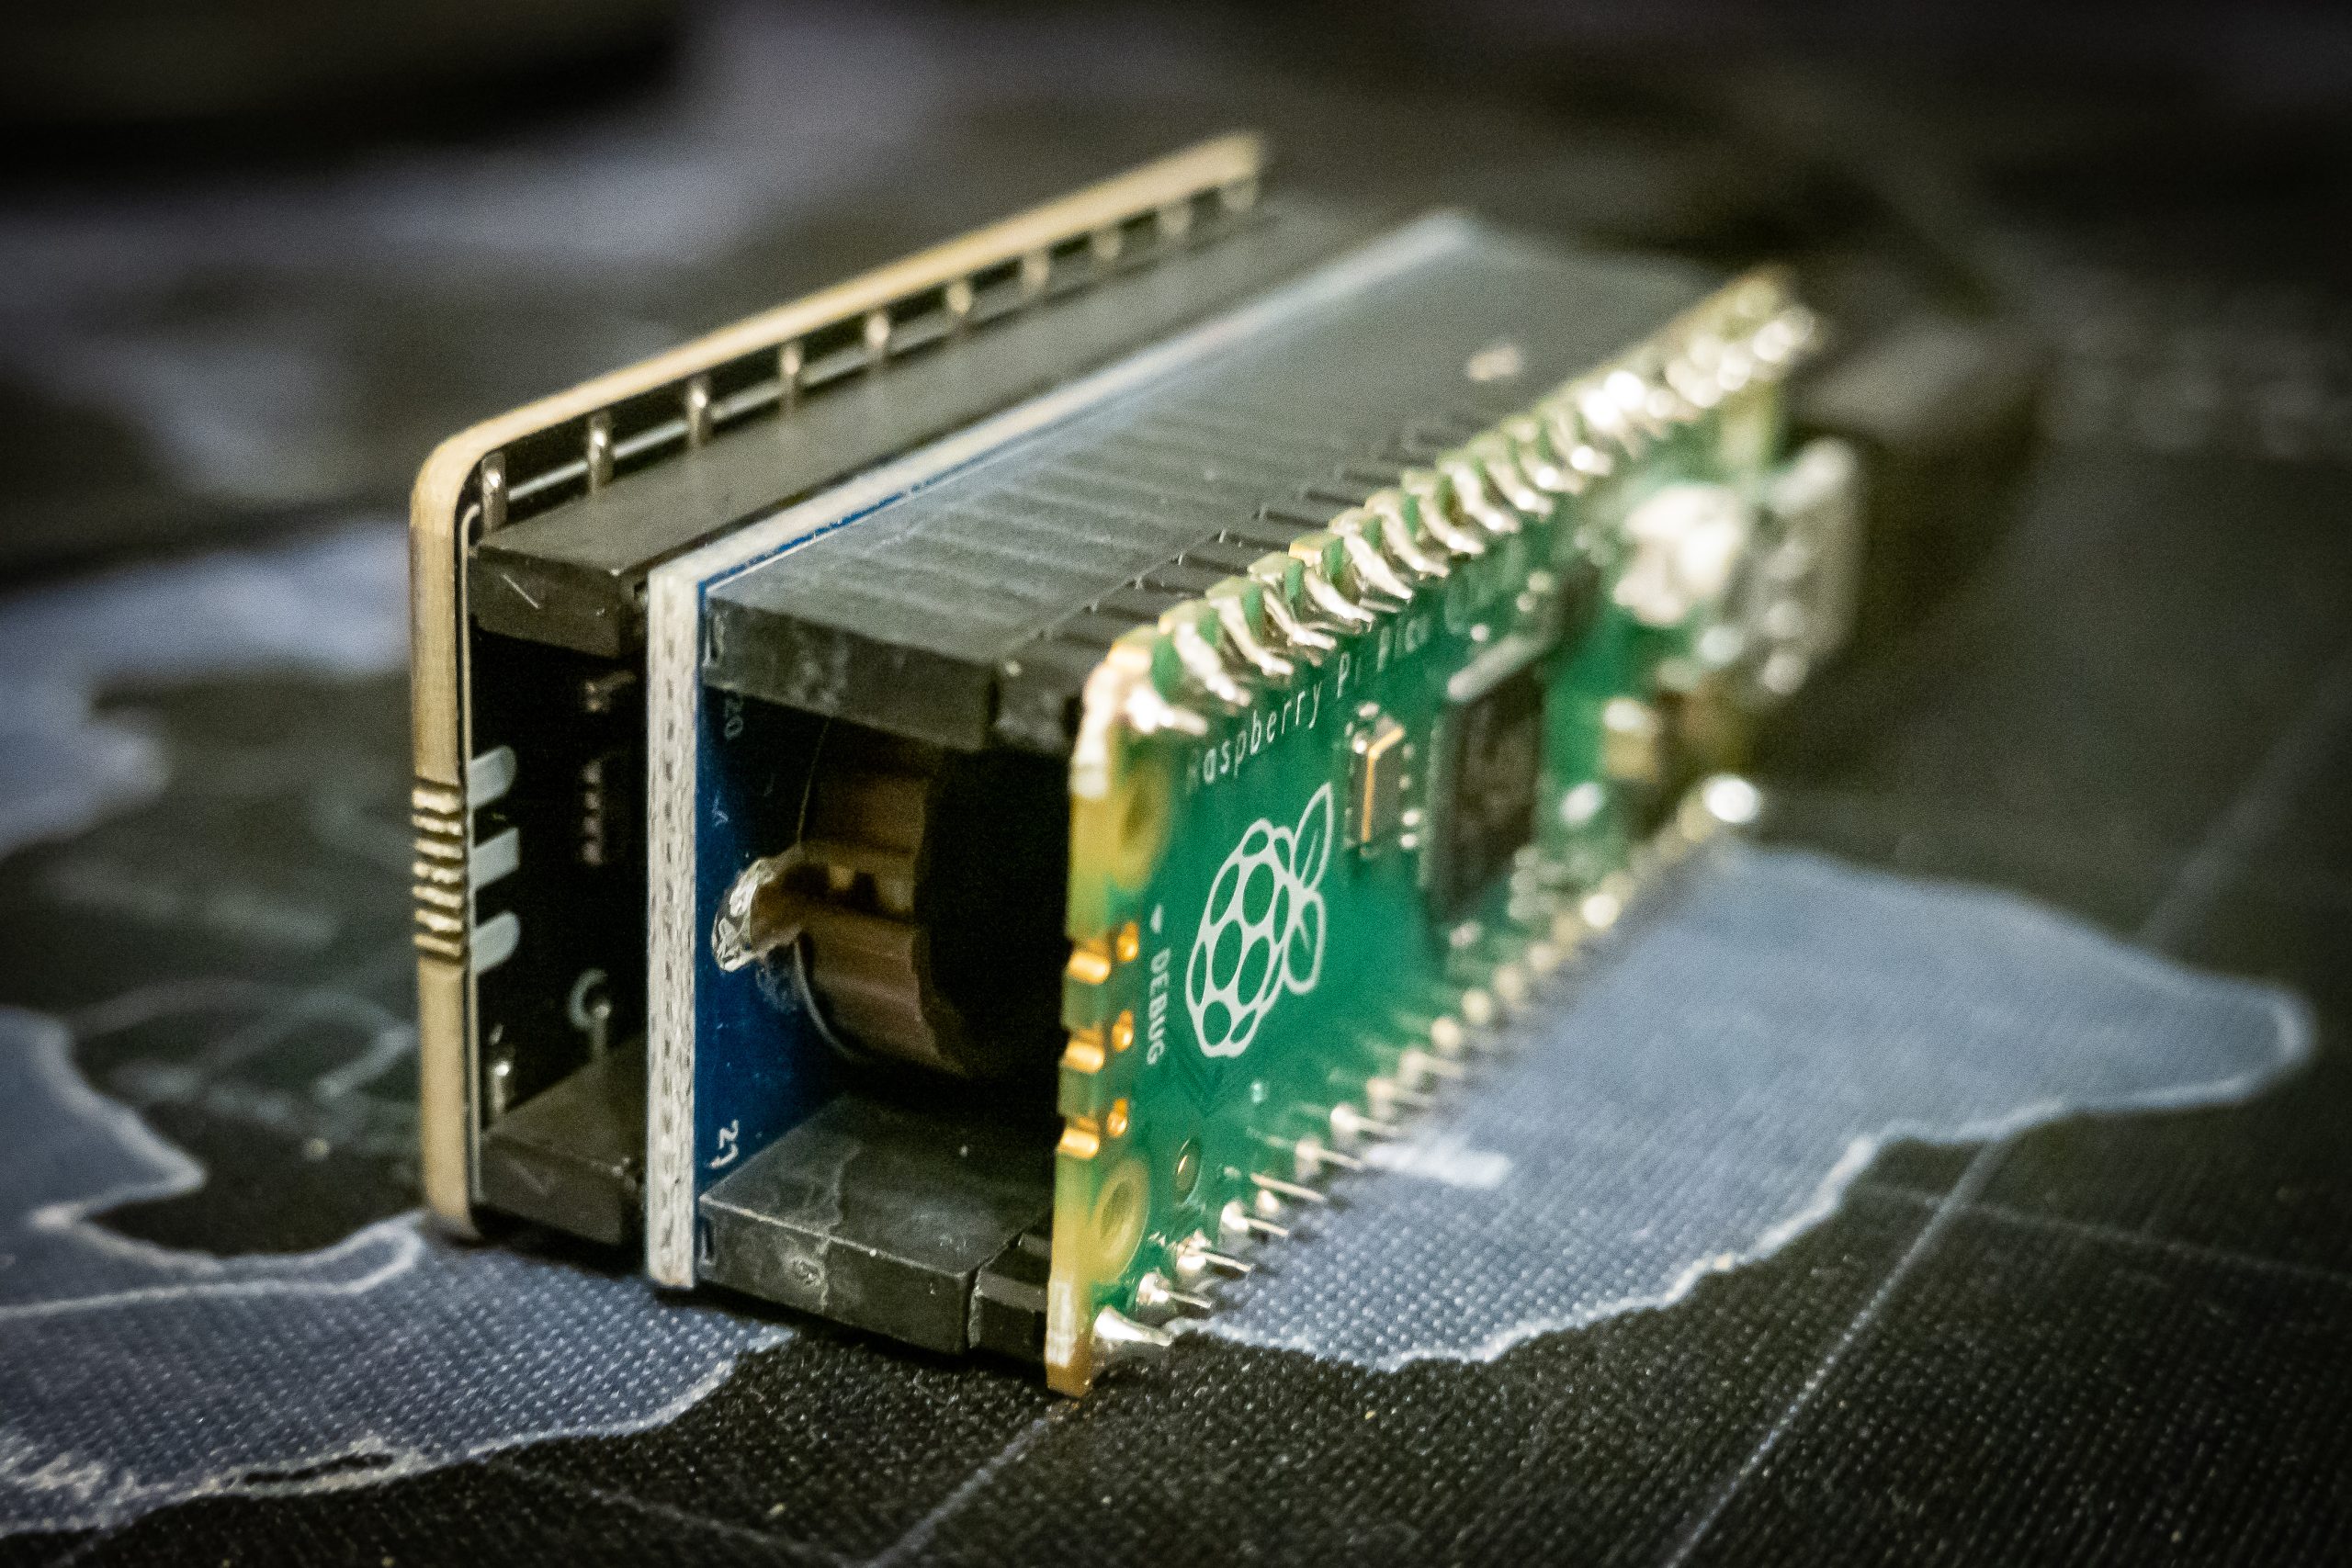
The Pico is on the top (at least for now), with the Raspberry Pi logo pointing upwards.
Then comes the sandwich filling of the Precision RTC DS3231. This should have the lithium coin cell battery facing upwards to receive the Pico, with the Raspberry Pi logo aligned up at the same end as the coin cell battery. The purpose of this unit is to keep time when the device is unplugged.
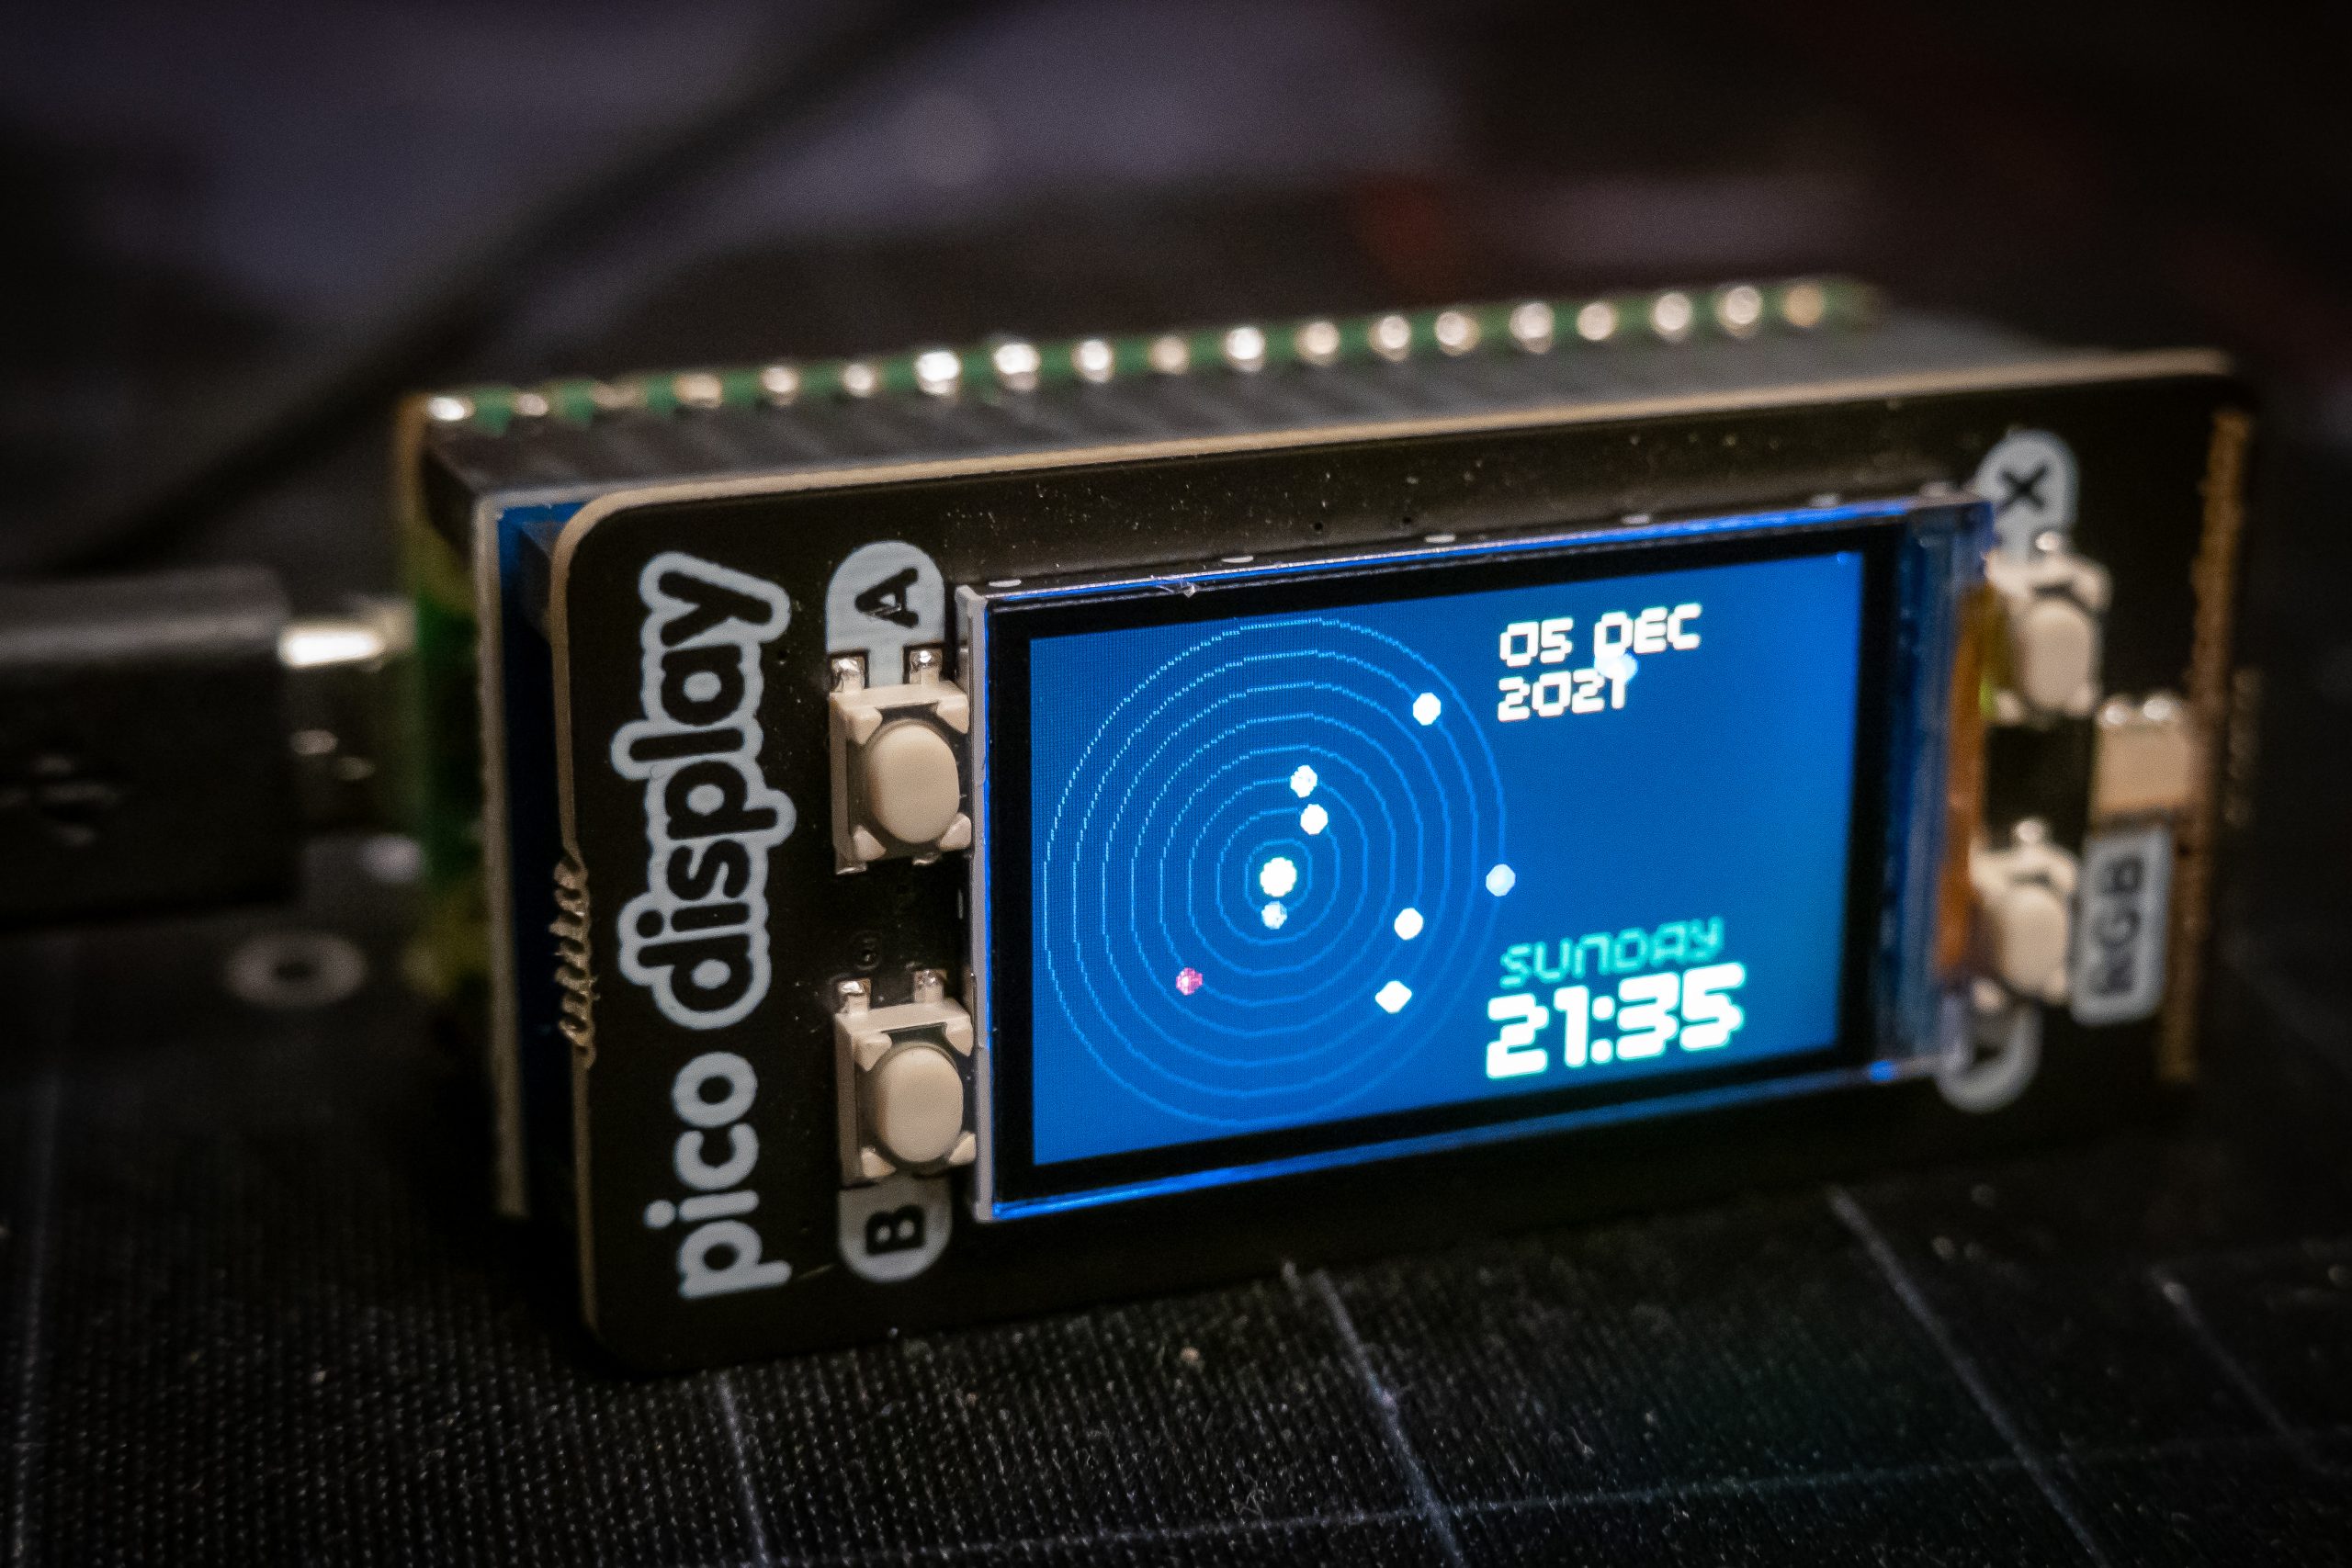
Finally comes the Pico Display, which will have the display facing downward (i.e. outward). The words “Pico Display” will be at the same end as the microUSB connection for the Pico.
Setting It Up on a Windows PC
I did this on a Windows 10 PC, but it should be the same for any version of Windows.
Installing Python
If you don’t already have Python installed on your computer, then you’ll need it. If you’re not sure, you probably don’t. But to check go to Start and type CMD which should bring up Command Prompt. Click that and in the Command Prompt window type python –version. If you get a number, then you’re good to go. Otherwise, you need to install it.
Here’s where I hit my first problem.
If you visit https://www.python.org/downloads/ you will be prompted, at time of writing, to download Python 3.10.0. But that didn’t work for me. So go to the full listing of Windows variants and for me, the best bet was Python 3.9.7. Click on Download Windows Installer for that version. You probably want the 64 bit version, but if you’re not sure, go to Start > Settings > System > About and see what it says in Device specifications system type.
Install Python, but make sure to click the checkbox next to “Add Python 3.9 to PATH.”
Once it’s installed, you can again check by going to Start typing CMD to bring up the Command Prompt, and then typing python –version and pressing return to check if you’ve successfully installed it.
This version of Python should have installed PIP for you. But you can check from the Command Prompt that you have the latest version by typing py -m pip install –upgrade pip which should make sure.
Setting Up the Pico
Now you need to install some software on the Pico. First of all, download the Micropython with Pimoroni Libs UF2 from Github. Note that you don’t need the version with added Adafruit libraries.
Connect your Pico to your computer while holding the small white BOOT SEL button. Release the button once the connection has been made and the Pico should show up in Windows as a new drive.
Then simply copy the UF2 file you’ve just downloaded into the root of the Pico folder. This will cause the Pico to reboot (and no longer appear as a Windows folder). The Pico is now running Micropython.
We now need to work out what COM port the Pico is on. There are various ways to do this, and it’s worth learning about Thonny. But for now, we’ll look in the Device Manager. Go to Start and type Device to bring up Device Manager. Click on it, and then look down the list for Ports (COM & LPT). Click to open it and look for a USB Serial Device with something like “(COM5)” – which is as it appears on my machine. Yours may be a different number. Make a note of it as we’ll need it shortly.
Installing rshell
In Dmitri’s instructions, this turned out to be the most fiddly for me to do. It would have actually made more sense in retrospect, doing all this via a Raspberry Pi 4. But I managed it via Windows, and here’s how.
Note that I found this video very useful, but I ran into problems that the presenter doesn’t, hence carefully pointing you to the right version of Python at time of writing.
From a Command Prompt you just type pip install rshell and after a few seconds that’s it!
Again, typing rshell –version (NB. there are two ‘-‘ symbols there) at a command prompt should bring up a version number – 0.0.30 for me.
Then we need to run rshell. At a Command Prompt type rshell -p COM5 –buffer-size 512. Replace “COM5” with whichever COM port number you found in the step above. Keep this Command Prompt window open.
Download the Github Pico Solar Display Files
Go to Dmitri’s Github page and download the zip file by clicking on the green button at the top labelled Code. Choose Download ZIP and save it somewhere you can navigate to later. Then unzip the folder and put is somewhere you know. I used C:\Users\adam\pico-solar-system-main
In the Command Prompt window, navigate to the correct folder, e.g. type cd c:\Users\adam\pico-solar-system-main. You can check the files are there by typing ls.
Then you need to copy each of the .py (i.e. Python files) to the Pico. For whatever reason, I couldn’t do it via a wildcard as Dmitri suggests, but there are only four files so type:
cp ds3231.py /pyboard/ds3231.py
cp main.py /pyboard/main.py
cp planets.py /pyboard/planets.py
cp pluto.py /pyboard/pluto.py
Obviously the Pico is named “pyboard” as you may have noticed earlier when you ran rshell.
Finally you need to set the realtime clock (RTC). So type the commands as Dmitri lays out:
repl
import time
import ds3231
rtc = ds3231.ds3231()
rtc.set_time(time.time())
Now all you need to do is pull out the microUSB cable and re-insert it. The Pico should automatically run the main.py file and that should get the display up and running.
You should now have a working Solar Display!
Summary
As I mentioned part-way through, this would probably have been a lot simpler if I’d used a cheap Raspberry Pi to set everything up – perhaps the new Raspberry Pi Zero 2!
But these instructions will – at time of writing – work on a Windows machine. Obviously, newer versions of Python and/or rshell may fix whatever problems I was encountering. But I’m pretty pleased with my display.
Dmitri has even supplied plans for a 3D printable case, so that’s next thing to do on my list!